Showing posts with label vegetarian. Show all posts

Monday, December 26, 2011

Ants on a Log


Yes, I'm trying to make up for lost time. I know I'm not exactly posting the most amazing holiday food you've ever seen, but let's be real. We aren't going to eat ham, sugar cookies, and peppermint bark 7 days a week. I hope, anyways. Well this is a great little snack for your child or even the fun-seeking adult. I know there are the traditional ants on a log, but I had a lot of other leftover ingredients and I absolutely loved the result so I had to share!

Ants on a Log
Adapted from: Kelly's Kitch original
Yields: about 9 "logs", or 3-4 servings

4 long celery stalks
Creamy honey peanut butter (splurge, it's so good)
1/4 cup craisins

Start by chopping the celery into 3-inch long segments and filling them with the creamy peanut butter (this usually works best if you have an outside stalk so there is room to fill). Place the craisins on the peanut butter and press into it to make it stick. Voila! Easy as .. pie?

Friday, December 23, 2011

Pasta alla Vodka


Are you needing an easy week night dinner that tastes like you've been slaving for hours? Look no further! This amazing dish has by far the absolute best sauce I've ever made! I made it twice, but it was still too involved and, per my husband, required too many dirty dishes for clean-up. The second try I think was the better of the two recipes! This is so creamy and delicious that I am thinking it might be on our weekly menu. I'm sure the liquor store will think we have really taken a liking Vodka when we keep coming back for it.

Pasta alla Vodka
Adapted from: Annie's Eats, originally Cooks Illustrated
Yields: 5 servings

16 oz dried pasta shapes
2 Tbsp olive oil
1/4 cup minced onion
1 Tbsp tomato paste
2 garlic cloves, minced
1 tsp red pepper flakes
1 can crushed tomatoes (15 oz)
1/4 cup water
1/2 tsp table salt
1/4 cup vodka
1/2 cup heavy whipping cream
1/4 cup reserved pasta water, if needed
2 Tbsp finely chopped fresh basil leaves
freshly grated Parmesan cheese, for topping

Cook pasta according to package directions until al dente and drain, reserving 1/4 cup pasta water. Meanwhile, heat the olive oil in a large skillet over medium-high heat until shimmering. Add onion and tomato paste and cook until onion is softened, about 3 minutes. Mix in garlic and red pepper flakes until fragrant, about 30 seconds.

Pour the crushed tomatoes into a 2-cup liquid measuring cup and add enough water to make it 2 cups (about 1/4 cup of water is necessary). Add this and the salt to the pan with the onion mixture. Remove pan from heat and add the vodka. Return pan to heat and simmer briskly on medium heat until alcohol cooks off, about 10 minutes. Reduce the heat if simmer becomes too brisk.

Stir in the cream and cook an additional 1 minute, being sure to not cook too long or else the sauce will separate. Add the pasta to the pan with the sauce and toss well. Cook on medium-low heat for about 3 minutes to allow the sauce to be absorbed by the pasta. If the pasta seems to thick, add some of the reserved pasta water. Both times I used all of the 1/4 cup and it made the dish much more creamy! Add the basil and top with Parmesan cheese when serving.

Tuesday, December 20, 2011

Mashed Potatoes


I've never really had a go-to mashed potato recipe, unless you call a box a "recipe." I was so sick and tired of taking the time to make instant mashed potatoes (that by the way are disgusting anyways), when I could have made them fresh in the same amount of time. My motivation to find the perfect recipe was jump-started by my mother bringing over bags of potatoes. What else could I do but make mashed potatoes and potato salad (recipe to come soon-ish.. hey, I'm being honest). These are so quick and the only time-consuming part is chopping the potatoes, but what else are you going to do while the water starts to boil?!

Mashed Potatoes
Adapted from: Kelly's Kitch original
Yields: 4-6 servings

6-8 medium-large russet potatoes, peeled and diced
1/4 cup shredded cheese, cheddar
2 Tbsp sour cream
2 tsp garlic powder
1/4 cup milk
4-6 Tbsp butter, depending on taste, at room temperature

Bring a large pot of water (1/3 of the way full) to a boil and add potato dices. Boil on medium-high until softened and a fork can easily pierce the potato all the way through. When potatoes are done cooking, drain in a strainer and return to the pot. Add cheese, sour cream, and garlic powder. Beat with hand beaters on low speed until cheese is melted and potatoes are the right consistency.

While beating, slowly add the milk a little at a time until potatoes are at the consistency of your preference. Do NOT over-beat the potatoes to get every single chunk out because they will become too starchy. Add the butter one tablespoon at a time with the beater and taste after each addition. Add more or less depending on your taste. Serve immediately.

Friday, September 9, 2011

Charred Corn Salad


Even though summer is coming to a close, I usually stock up on fresh corn on the cob for the winter. There is a local grower who I frequently purchase from at the farmer's market and their corn is substantially better tasting than any I've ever had before; hands down. I love fresh corn in the winter and the frozen and canned corn just isn't the same. Most of you are probably thinking I'm a little crazy for thinking this kind of corn is better, but when you bite into that juicy wonderful cob .. you know. Anyways, I saw this recipe on my new favorite show, Kelsey's Essentials, and just had to try it out. It looked amazing, but it tastes even better! This would be a great addition to any late summer hurrahs. Or it has made a wonderful side dish for my lunches lately. :)

Charred Corn Salad
Adapted from: Kelsey Nixon (Cooking Channel)
Yields: 4-6 servings

3 ears of corn, shucked
1-2 Tbsp canola oil
salt and pepper, for seasoning
3/4 cup packed, fresh basil leaves
1 clove garlic, grated
1/8 cup cider vinegar
1/8 cup extra virgin olive oil
8 oz cherry tomatoes, halved (almost a full 10-oz container)
1/4 small red onion, chopped

Preheat a grill pan, grill or broiler on high heat. I chose the broiler and it took a while, but it was a good alternative to grilling since it's so cold outside. Brush or rub the corn cobs in the canola oil and season with salt and pepper. Place the corn on the grill until charred, about 2-3 minutes, on each side (longer if using the broiler). Once the corn has charred, set aside to cool. Once cooled, stand each ear up inside of a wide, shallow bowl. Cut the kernels off of the cob with a sharp knife. Keep kernels in bowl and set aside.

Meanwhile, combine basil and garlic in a blender or food processor and pulse until it starts to chop up a little. Add vinegar, continue pulsing, and slowly add in the olive oil. Continue to pulse until mixture is smooth. Note: There will be small pieces of basil; this will not completely liquefy.

Add the basil mixture to the bowl with the corn kernels. Add onion and tomatoes and toss well to combine. Taste and season with salt and pepper as needed.

Wednesday, June 22, 2011

Corn Chowder


Usually chowder is a fall or winter recipe. Also, I'm not a big fan of soup. The recipe and picture just looked amazing from reading my new cook book and so I dog-eared it. It took a week of coercing myself to get the energy to make this, but in the end it really didn't take that long at all! If you're not really a soup fan like myself, then just give this a try; you won't regret it. If you love potatoes and corn, then you will absolutely love this recipe. The one complaint I think I had was that if you eat the soup by itself, it's sort of bland-tasting so I HIGHLY recommend adding cheese and even bacon pieces. I think next time I'll add a little more salt and pepper as well as melt in a little cheese. The recipe below is the original.

On a side note, I am about two weeks away from my due date. That is why the posts have been MIA lately and probably will continue to be. I have pictures, new recipes, and more, but what little energy I have is reserved for naps, cleaning and daily contractions. I apologize, but please do enjoy the rest of my blog posts in recent months for all of your recipe needs. I'll be posting my favorite summer recipes in the coming weeks to give you all a taste of what my summer will (hopefully) be like this year!

Corn Chowder
Adapted from: Simply Suppers
Serves: 8-10 *

2 Tbsp unsalted butter
1 Tbsp olive oil
1 cup yellow onion, finely diced
2 garlic cloves, minced
1/2 tsp dried thyme
1/4 cup all-purpose flour
6 cups chicken stock
4 large russet potatoes, peeled and diced
2 cups half-and-half
4 cups corn kernels, thawed if using frozen
kosher salt
finely ground black pepper
1/2 cup shredded cheddar cheese, for topping
1/4 cup cooked bacon, crumbled, for topping

In a large stockpot over medium-high heat, warm the butter and oil until a few droplets of water sizzle when sprinkled into the pot. Add onions, garlic and thyme. Cook, stirring occasionally until soft, about 4 minutes. Dust the onion mixture with flour and stir to coat. Cook for 1 minute and whisk in the chicken stock. Increase heat to high and bring the mixture to a boil.

Add potatoes and bring mixture back to a boil. Stir in half-and-half. Reduce heat to medium and simmer uncovered for 15 minutes, or until potatoes are tender.

Add the corn and simmer until the corn is softened, about 15 minutes. Season with salt and pepper to taste. Serve hot and garnish with cheese and bacon as desired.

* NOTE: This recipe makes a lot of soup. If you are a smaller family and don't want too many leftovers, then halve the recipe.

Monday, May 9, 2011

Green Monster Smoothie


Green food, okay. Green drinks, not okay? I have heard about and seen this Green Monster Smoothie just about everywhere in the past year or two. I've been afraid to try it for one reason: it's green. And guess what gives it that bright green color? Spinach leaves! Of all things that shouldn't be in drinks!! Or should it?

I wanted to try this drink because it had so many good ingredients that I love (minus the spinach of course). I made a slight adjustment and omitted the honey, but it was perfectly sweet with all the fruit in it. It turned out absolutely amazing! I guess I just want more go-to drink recipes because it seems like I have so few. Try this recipe and adjust it however you like, adding or omitting any ingredients you think it needs. Next time I might do half pineapple and half mango. That sounds delicious! And if you were wondering, you absolutely cannot taste the spinach!!

Green Monster Smoothie
Adapted from: Annie's Eats, originally une-deux senses
Serves: 3-4

1 banana, cut into 1-inch chunks
1 cup frozen, chopped pineapple
1 pear, peeled and coarsely chopped
1 1/2 cups orange juice
2 1/2 cups baby spinach leaves, rinsed and dried

Combine all ingredients into a blender and puree until completely smooth. Enjoy immediately or store in fridge for up to 3 days. Mixture will need a good shaking/stirring when not enjoyed immediately.

Monday, March 14, 2011

Banana pancakes


Pancakes are my absolute favorite breakfast to have on the weekends! I love them with fruit and sometimes a little syrup (okay, I drown them in syrup). When I ran out of the boxed pancake mix, I thought to myself that I could surely find a recipe that I have all the ingredients for. I went to my favorite blogger’s website and of course, she delivered! I might even try a waffle recipe whenever we replace our old waffle maker that broke.

These pancakes weren’t to-die-for, but were just as delicious and the same amount of effort as the boxed stuff you buy at the store. I love that they are fresh, homemade, and I know exactly what went into them. My husband approved! I usually cook pancakes on the stove, but my uncle got us an unregistered gift for our wedding (this one was actually something I liked); a griddle. I LOVE our griddle! It’s so easy to entertain in the morning and make breakfast all on one big plate instead of making one pancake at a time. I can make 6 pancakes or 4 pancakes and lots of bacon or sausage all at once. I love that because soggy pancakes are gross!

I also wanted to make note that I always keep browned bananas in my freezer, usually for banana bread. If you do this, instead of just throwing them away, you can simply warm them in the microwave for 30-second increments in order to soften them right up! Snip the tip of the peel off and squeeze out the mushy banana. No need to use a fresh one (that would probably make a great snack for later).

Banana Pancakes
Adapted from: Annie’s Eats, originally Williams-Sonoma
Yields: 8 pancakes

4 Tbsp unsalted butter, melted
1 ½ cups all-purpose flour
2 Tbsp sugar
2 ½ tsp baking powder
¼ tsp salt
1 small ripe banana, mashed
1 cup milk
2 large eggs
½ tsp vanilla extract
Bananas & strawberries, sliced for serving
Maple syrup, for serving

In a medium bowl, combine the flour, sugar, baking powder and salt. Whisk to combine. In a separate bowl, combine the mashed banana, milk, eggs, and vanilla. Mix well. Add the melted butter and banana mixture to the first bowl with the dry ingredients and mix gently with a rubber spatula. Batter will be slightly lumpy.

Heat a skillet or griddle over medium heat (325˚ F) and lightly grease with butter or cooking spray. Drop the batter in 1/3 cup portions onto the heated surface. Cook until bubbles start to form on the surface and then flip. The bottom should be golden-brown. Continue to cook until the other side is golden-brown. Serve immediately and top with fruit and/or syrup as desired.

Tuesday, March 1, 2011

New York Cheesecake


Cheesecake is one of my (many) weaknesses when it comes to food. I am willing to try almost any type or flavor of cheesecake. I’ve had several versions but there is always one classic that never gets old: New York Style. Up until recently I’ve not had any springform pans to be able to try this classic at home. I purchased some right after Christmas and forgot about them until now. I am so incredibly glad that I remembered them. I made this cheesecake for my mom’s birthday this year and everyone just loved it!

New York Cheesecake
Adapted from: Annie’s Eats, originally Baking Illustrated
Yields: 1 9-inch cheesecake

For the crust:
5 Tbsp unsalted butter, melted
4 oz graham cracker crumbs
1 Tbsp white sugar
1 Tbsp butter, melted, for greasing the pan

For the cheesecake:
2 ½ lb cream cheese (5 8-oz packages), chopped roughly at room temperature
Pinch salt
1 ½ cups white sugar
1/3 cup sour cream
2 tsp lemon juice
2 tsp vanilla extract
2 large egg yolks plus 6 large eggs, at room temperature

To make the crust, preheat oven to 325 degrees and adjust an oven rack to the lower-middle position. Brush the bottom and sides of the pan with ½ of the tablespoon of melted butter. In a separate small bowl, combine the graham cracker crumbs, butter and sugar. Mix well and pour into the springform pan. Press the crust firmly onto the bottom of the pan in an even layer. Using your fingers has always been the best method for me. Bake until fragrant and it begins to brown around the edges, around 13 minutes. Cook on a wire rack while preparing filling.

Increase oven temperature to 500 degrees. In the bowl of a stand mixer fitted with the paddle attachment, beat the cream cheese at medium-low speed to break up and soften slightly, about 1 minute. Scrape the beater and bowl with a rubber spatula. Add the salt and half of the sugar and continue to beat on medium-low until combined, about 1 minute. Scrape the bowl again. Beat in the remaining sugar until combined, about 1 minute. Scrape the bowl and add the sour cream, lemon juice, and vanilla. Beat on a low speed until combined, about 1 minute. Scrape the bowl and add the eggs and yolks one at a time until thoroughly combined. Scrape the bowl in between each addition.

Brush the sides of the springform pan with remaining ½ tablespoon of melted butter. Set the pan on a rimmed baking sheet in case the pan leaks (mine were new so luckily they didn’t leak). Pour the filling onto the baked crust in the pan. Bake 10 minutes, turning often, and then reduce the heat to 200 degrees. Continue to turn about halfway through baking time. Bake until the cheesecake reads about 160 degrees on an instant read thermometer. Do not bake less than 1 hour and 45 minutes. I baked mine for about 1 hour and 30 minutes and it wasn’t finished yet so I had to bake it a little more later. I would say that 2hours is a great time frame to aim for. Note: The temperature of the cheesecake might exceed 160 degrees, but this is okay.

Transfer cake to wire rack and cool until barely warm to the touch, about 2 ½ hours. Run a paring knife between the cake and the springform pan sides. Wrap tightly in plastic wrap and keep in the fridge until ready to serve, at least 3 hours. To unmold the cheesecake, remove the sides of the pan and slide a thin metal spatula underneath the crust to loosen. Slide the cake onto a serving plate and let it stand at room temperature for about 30 minutes. Cut into wedges and serve.

Note: Use a long, thin and sharp knife that has been run under hot water and dried for slicing. Wipe the blade clean and rewarm in between slices.

To make the strawberry sauce, simply mix 1 pint of strawberries roughly chopped with 1/3 cup sugar in a covered bowl or tupperware container and leave in the fridge for 3+ hours.

Tuesday, February 22, 2011

Strawberry Stuffed French Toast


French toast is amazing. This french toast is to-die-for amazing. I have never had french toast with anything other than powdered sugar and syrup. Neither my husband or I needed the syrup for these because they were so tasteful on their own! I usually don't like french toast because I know it's not all that healthy for you and the syrup really makes it soggy. Well, here is a wonderful solution for those that have missed out on the amazing taste of french toast. I served this with some strawberries on the side, which were an amazing complement.

Strawberry Stuffed French Toast
Adapted from: Annie's Eats, originally Williams-Sonoma
Yields: 4 servings

For the filling:
1 cup largely chopped strawberries
2 Tbsp white sugar
4 oz. cream cheese, softened

For the toast:
4 thick slices of bread (challah or soft Italian)
1 large egg
¾ cup milk
2 Tbsp melted butter
1 tsp vanilla extract
¼ cup all-purpose flour
¼ tsp ground cinnamon
¼ tsp salt
unsalted butter
Syrup, powdered sugar and fresh strawberries for serving

To make the filling, combine the sliced strawberries and sugar in a medium bowl. Mix well and set aside to macerate for about 15 minutes. Stir in the cream cheese until well blended.

Meanwhile, to prepare the toast, carefully slice a pocket into the center of each slice of bread (parallel with the cut sides) almost all the way through. The easiest way to do this is when cutting the bread off of the loaf, cut a thin slice almost all the way down (for the pocket) and then move over and cut the slice of bread off.

Heat a large skillet over medium heat. In a pie plate, whisk the egg and milk together. Add the melted butter and vanilla, whisking to combine. Stir in the flour, cinnamon and salt until smooth. Fill the pocket of each slice of bread with some of the filling mixture; don’t afraid to stuff until your heart’s content! Two at a time, place the filled slices of bread into the pie plate mixture, soaking for 30-40 seconds on each side. Set aside on a plate and repeat with remaining bread slices.

Add 1 tablespoon of butter to the heated skillet and allow to melt and coat the pan. Add the filled slices of bread to the skillet in a single layer. Cook until light golden brown and crisp, about 2 minutes per side. Repeat with remaining slices of bread and serve immediately.

Friday, December 24, 2010

Classic Cheese Ball


MERRY CHRISTMAS EVE!!

If you have ever been to a dinner party without a cheese ball, I apologize. Cheese balls are the quintessential appetizer and have been for decades. I love most cheese balls, but there have been a few I didn't quite like. I wanted to be sure to make one that was amazing and beautiful, too, for our family Christmas dinner. I found a recipe that looked like a winner online and amazingly enough it turned out great. I will adapt it next time with different cheeses and maybe even use grated instead of shredded cheese, too. Adapt it how you want, but try the original first because it's surely a winner!

Classic Cheese Ball
Adapted from: About.com
Yields: 1 large cheese ball

18 ounces cream cheese, room temperature
8 ounces shredded or grated cheddar cheese
2 tsp grated onion
2 tsp worcestershire sauce
2 tsp minced garlic
finely chopped pecans

In a large mixing bowl, combine all of the ingredients except pecans. Mix well with a hand blender to make sure everything is uniform throughout. Roll into a ball using plastic wrap and store in the fridge for 1 hour. Remove ball from plastic wrap and roll in chopped pecans to cover the surface. Rewrap cheese ball in clean plastic wrap and store in the fridge until the day you are serving it. Set cheese ball out 2 hours before guests arrive. Serve alongside a variety of crackers.

Wednesday, December 22, 2010

Deviled Eggs


Deviled eggs are a classic (and easy) addition to any get-together. These work especially well for Christmas and Thanksgiving because you can easily prep them the day before and just store in the fridge until everyone is ready to eat. My mom gave me this recipe because she absolutely makes the BEST deviled eggs, hands down. A lot of people just cut the hard boiled eggs in half but I think that tastes gross and it has a really dry texture. This method utilizes ingredients everyone always has on hand and it's extremely easy to make.

Deviled Eggs
Adapted from: Kelly's Kitch Original
Yields: 16 deviled eggs

8 large eggs, uncooked
mayonnaise, to taste
mustard, to taste
nutmeg, for sprinkling

To hard boil the eggs, place them in a large pot full of enough cold water so they are covered. Be sure there is a little extra water on top as well. Place pot on the stove and boil for 12 minutes and then remove pot from hot burner, place a lid on top and let sit for 8 minutes. Meanwhile, prepare a cold water bath in a large bowl (cold water and ice). Place the eggs in the cold water bowl and let cool down for approximately 5 minutes.

Once eggs are cool enough to handle, gently (VERY gently) crack the egg shell by lightly tapping it against the countertop or another flat surface. When the egg shell cracks, carefully peel away the shell and clear layer underneath to expose the hard boiled egg. Repeat with remaining eggs.

Cut eggs in half lengthwise and place all the yolks in a medium mixing bowl. Add about 4 Tbsp mayonnaise and 2 tsp mustard to start. Mix with the yolk, being sure to break the yolk up well. Taste for consistency. Add more mayonnaise or mustard as desired. Fill the egg halves with the mixture and sprinkle with paprika for effect.

Friday, November 12, 2010

Spinach Artichoke Dip


If my husband and I are eating out at a restaurant, we typically splurge a little bit. Spinach and artichoke dip is one thing we never disagree on when it comes to ordering an appetizer. I never really thought I could replicate any dip recipe, but this is a healthier and just as tasty spinach and artichoke dip. I actually baked these in smaller ramekin's so that we could bring them in our lunches. My husband absolutely loved them! According to the website these little guys are about 100-110 calories per 1/4 cup (about the size of my rammekins). I added a tiny bit more cheese so it's a little over 100 calories.

Spinach Artichoke Dip
Adapted from: Food Network
Serves: 4-6

Pinch salt
10 oz baby spinach leaves
fresh basil (1 cup); or 4 Tbsp dry basil
¾ cup canned cannellini beans, drained and rinsed
6 oz Neufchatel cream cheese
1 garlic clove, minced
½ cup chicken broth
14 oz can artichoke hearts, drained, squeezed dry, and finely chopped
½ cup grated parmesan cheese
1 cup shredded mozzarella cheese
pinch cayenne pepper, to taste
2-3 dashes Worcestershire sauce
pinch ground pepper, to taste
chips, for dipping

Preheat the oven to 450-degrees. Boil water and salt stovetop. Prepare an ice water bowl while water is heating up by placing very cold water and lots of ice cubes into a large mixing bowl. Stir the spinach leaves into the boiling water and keep immersed for 30 seconds, until the leaves turn bright green. Remove spinach from boiling water and place into ice water bath. Drain and squeeze dry, then roughly chop.

Puree the beans, cream cheese, garlic and broth in a food processor until smooth. Transfer to medium mixing bowl and fold in the chopped spinach, artichokes, parmesan and ¾ cup of the mozzarella cheese. Add cayenne pepper, Worcestershire sauce, salt, and black pepper. Toss to combine.

Place mixture into oven-proof, greased individual ramekins or large serving bowl, about 1-quart. Top with remaining mozzarella cheese. Bake until bubbly, about 20-25 minutes at 450 degrees.

Wednesday, October 13, 2010

Homemade Applesauce


I scoured the internet and some of my favorite blogs for an applesauce recipe that I could do in the crock pot, but there were none that I could find. Luckily I felt confident enough to make my own recipe based off of the recipes I did find. All the recipes used cinnamon and I knew I wanted that in it. A lot of them also used extra water to allow for a certain consistency. Some of the recipes called for cloves but I omitted just to keep this recipe simple and easy.

The hardest part of this recipe (and most time-consuming) is peeling, coring and chopping up the apples. I actually used a Pampered Chef Apple Peeler/Corer/Slicer so that made the process a hundred times easier. I'm not trying to sell the product but I almost chopped the apples by hand because so many people had negative reviews on the product. I have heard that it doesn't work well unless the apples are rock hard, or that it doesn't work well if the apples aren't perfectly round. Despite all the negativity surrounding the product, I still hadn't used it before so I didn't want to misjudge it. Trust me when I say that the size, shape or consistency of the apple DO NOT MATTER! I absolutely loved the product and although at times it can be a little monotonous, it really helped with this recipe (and I will now use it for when I make my Apple Pie).

Homemade Applesauce
Kelly's Kitch Original
Yields: 4 cups

6 large Braeburn (or sweet) apples, peeled, cored and diced
1/2 cup sugar
1/3 cup water
3/4 tsp cinnamon

Mix all ingredients in a crock pot on low for at least 5 hours. Place contents in a blender or food processor and mix, pulsing until desired consistency. I chose to pulse mine briefly so it's a little smooth and a little chunky, too. Serve warm or cold as a snack or dessert.

Saturday, September 25, 2010

Baked Stuffed Peaches


If you haven't already scrolled down to the recipe, you have figured out that I made this from a grilling cookbook, but I actually baked them instead. This is a great adaptation if you live in a cold-weather state like Indiana and don't really have access to a grill 365 days a year. On that note, I recently have decided I want to retire to Grand Turk; it's beautiful and the people are amazing. Back to reality though. Winter is coming (not too soon please) and I want to be prepared. I have included both sets of directions for whichever you decide is best for your family. Either way these will be a big hit with kids, adults and even the ones trying to lose weight.

Baked Stuffed Peaches
Adapted from: Low-Fat Cooking on the Grill
Yields: 8 peach halves

4 large peaches
2 Tbsp lemon juice
1/3 cup oats (recipe calls for quick-cooking but traditional works, too)
2 Tbsp firmly packed brown sugar
1 Tbsp almonds, finely chopped
2 Tbsp butter, melted
1/2 tsp cinnamon

(EDIT) Begin by halving the peaches and pitting. Then, in a large pot of boiling water, cook the peaches for no more than 30-45 seconds. This will loosen the skin without actually cooking the peaches. Rinse them in a strainer under cold water and carefully remove the skin. Sometimes they come easier but a paring knive is ideal. To make the peaches lay flat, slice a small thin piece from the backs of the peaches. Place peach halves in a bowl and toss with lemon juice and set aside.

To make the stuffing, combine oats, brown sugar, almonds, butter and cinnamon in a small bowl. Divide this mixture evenly between the peach halves and stuff the centers.

For grilling:
Preheat the grill to medium heat. Spray the grill cooking plate (off the grill) when ready to cook peaches. Place the peaches on the grilling plate, covered, for 5-6 minutes or until they are tender.

For baking:
Preheat the oven to 375 degrees. Place peaches on a silpat lined baking sheet and bake for 8-10 minutes.

Serve warm.

Friday, September 17, 2010

Grilled Beans


For not really ever liking baked beans growing up, I sure do have a lot of recipes on here for beans. Although my traditional baked beans are still my favorite, this goes perfectly with grilled chicken since the sauce is the same and it's oh-so-delicious. I would say these remind me more of fall and the other ones really are a spring/summer dish. These baked beans are so easy to make and really do make a perfect side dish to any BBQ you are planning!

Grilled Beans

1.5 cups tomato sauce (marinara sauce)
1.5 Tbsp finely packed brown sugar
1 Tbsp ginger, grated
1/2 Tbsp red wine vinegar
1 garlic clove, minced
2 cans pinto beans (15-oz each), rinsed and drained

In a small bowl, combine tomato sauce, brown sugar, ginger, vinegar, and garlic. Place mixture into a medium to large saucepan and add the beans. Bring to a slight boil and reduce heat to simmer for 15 minutes, until beans are slightly coated and sauce is thickened.

Pour beans into a disposable foil pan and cover with foil. While grilling chicken or cooking your main meal on the grill, place the beans on the side of the grill for 10 minutes to reheat. Serve warm with grilled chicken!

*Note: If you are making the grilled chicken recipe, the sauce measurements for that are enough for both the chicken AND the beans. I halved this recipe in case you are only making these beans by themselves.

Sunday, September 5, 2010

Old-Fashioned Coleslaw


Travel Note: My husband and I will be on a cruise this week celebrating our one year anniversary. Today we will be enjoying Half Moon Cay, Bahamas.

It's almost that time of year again .. Fall. I have yet to meet someone who doesn't like fall. My husband only likes it because of the food and the weather; otherwise he hates that the next season is his least favorite: winter. Let's not rush that one, though. Fall reminds me of gourds, pumpkins and more fun flavors. One that I have yet to try (and that I have protested all my life) is coleslaw. I never eat it when it comes on the side at a restaurant. I never have made it before. Although this recipe needed some tweaking (I used a LOT less mustard), it was a pretty good start to a classic dish. I am trying to eat healthier now and vegetables are one category that I like to not veer from my "norms". This was one recipe I'm sure glad I didn't pass up.

Old-Fashioned Coleslaw

3/4 cup plain nonfat yogurt
2 Tbsp reduced-fat mayonnaise
2 Tbsp cider vinegar
1/2 Tbsp dijon mustard
1/2 tsp salt
1/4 tsp freshly ground black pepper
1 head cabbage, shredded
2-3 carrots, shredded

In a large bowl combine all ingredients except cabbage and carrots. Mix well. Add cabbage and carrots and toss to combine evenly. Cover and refrigerate before serving. Best if eaten same day for crisp cabbage.

Saturday, August 28, 2010

Spicy Citrus Black Beans


Black beans really used to make me wanna gag. Now, I am pretty open to them since beans come on every item at Qdoba, one of my favorite "American Mexican" places to eat. I definitely prefer black over pinto beans for sure! I have never made them at home because I was just too lazy but this is quick, easy and makes for a wonderful side dish to any summer meal!

Spicy Citrus Black Beans
Adapted from: Annie's Eats, originally Simply Recipes

1 large can black beans (28 oz)
2 Tbsp olive oil
1 yellow onion, chopped
1 green pepper, chopped or minced (you can also substitute for another bell or jalapeno)
1/2 - 1 cup chicken or vegetable broth
1.5 tsp oregano
2 bay leaves
1/2 tsp salt
3 cloves garlic, minced
1 tsp chipotles in adobo, pureed
1.5 tsp ground cumin
1/4 cup orange juice
Juice of 2 limes (added lime zest, optional)
1 Tbsp white wine vinegar
Chopped fresh cilantro, to taste, plus more for garnish (optional)

Rinse the beans well in a colander over the sink. Heat olive oil in a medium saucepan on medium-high heat. Begin to sauté onion and pepper until tender, about 5-6 minutes. Add the garlic and sauté until fragrant, 30 seconds. Stir in the rinsed beans and mix in broth (use however much you would like to have more or less liquid). Bring to a simmer and add oregano, bay leaves, salt, chipotle puree, cumin, orange juice, lime juice and vinegar. Once simmering, reduce heat to medium-low and cover for 20-25 minutes. Stir occasionally. Once done, remove from heat and stir in cilantro (if using) and serve warm.

Saturday, April 3, 2010

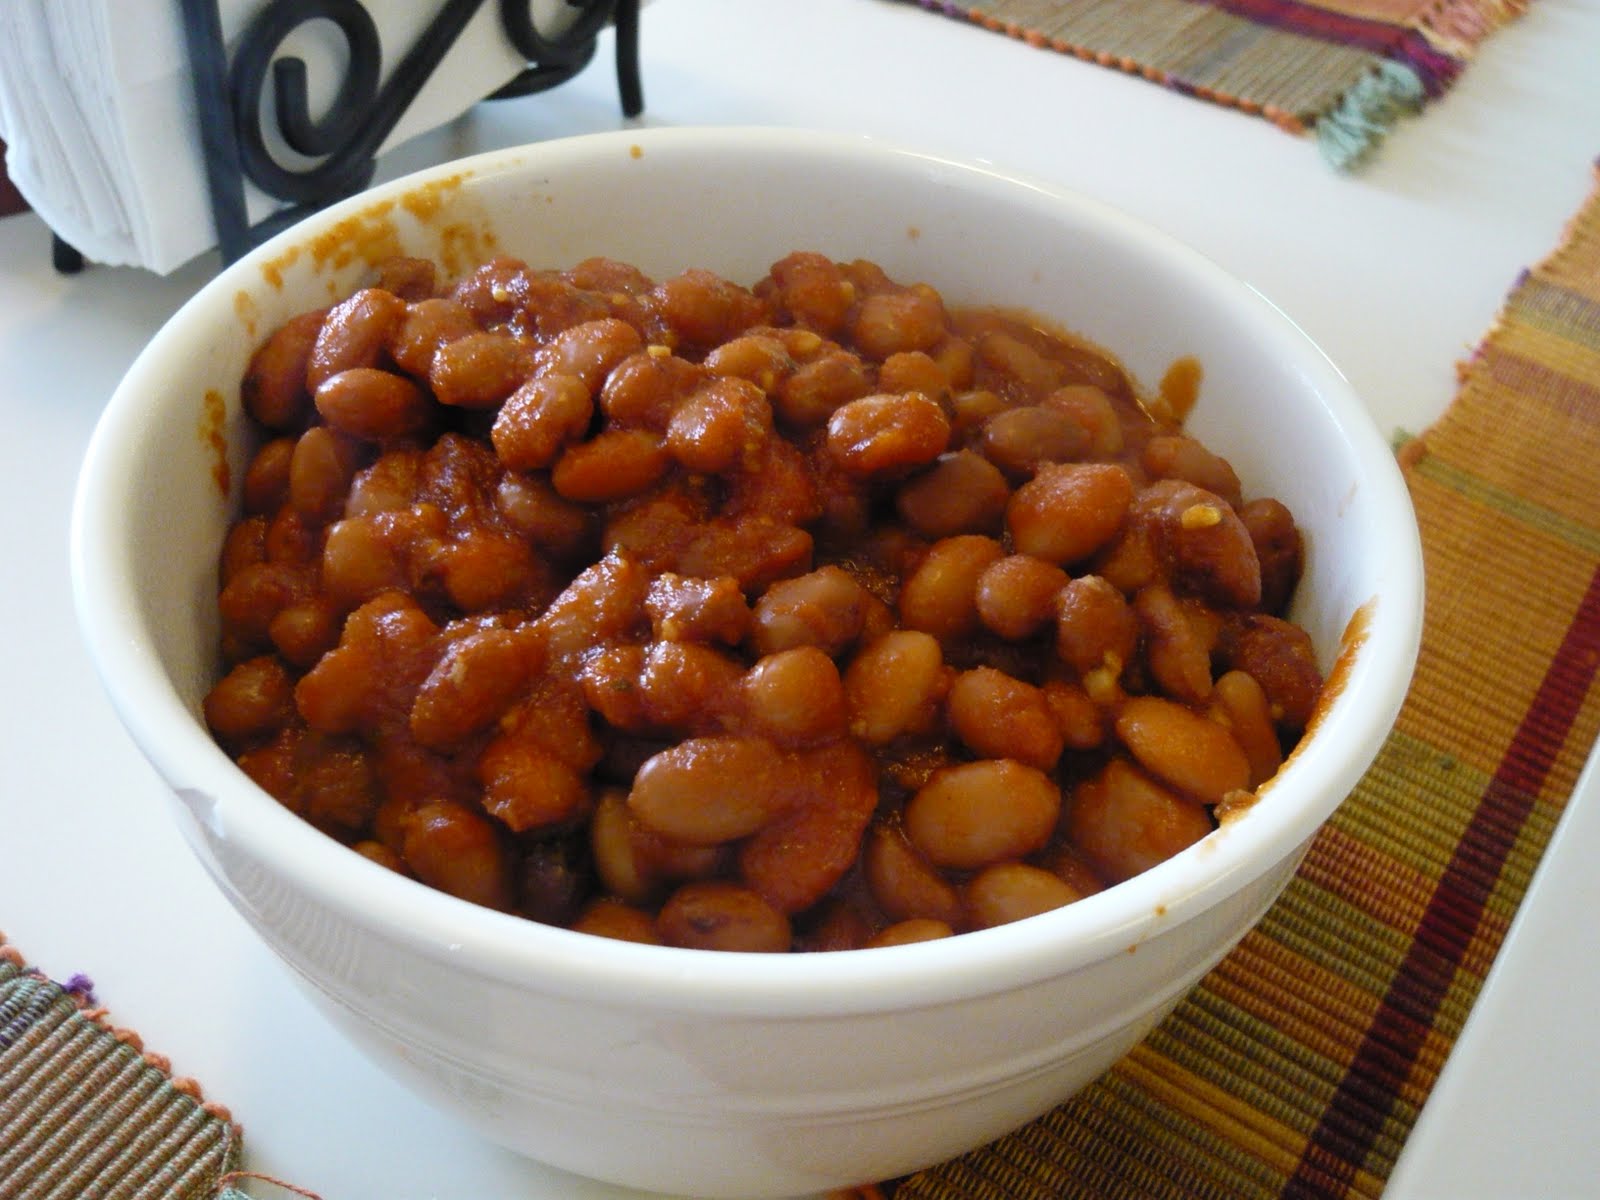
Old Fashioned Baked Beans


Beans, beans, the magical fruit .. just kidding! Every time I make baked beans (almost never) I have to sing that song at least once. It just makes me giggle inside. Yeah, sometimes cooking reverts me back to my 9-year-old immature days. We all know we were once immature. Getting back to the recipe .. my husband had a friend over to go fishing this past weekend and I couldn't pass up this opportunity to try out my moms baked beans recipe. Of course she loves her onion so if this were her actual recipe it wouldn't look like beans in the picture, it would look like onions with a few beans spread throughout (you know I love ya, mom). Well I used just a pinch of onion because my husband doesn't too much care for it and a few other common household ingredients and voila! The perfect side dish for your BBQ or party this summer. I am not sure why I skipped over doing Easter recipes but I really, really, really am enjoying all this unseasonably warm weather we have been having!

Old Fashioned Baked Beans
Adapted from: Kelly's Kitch original (mamma's recipe)

1 can baked beans of preference (1lb) - I chose country style
1/3 cup chopped onion
1/3 cup brown sugar
1/3 cup ketchup
2 tbsp dijon mustard (or you can use regular mustard too)

Mix all ingredients in a 9x9 greased baking dish on 375 degrees for 45-50 minutes uncovered. Remove from oven and allow to sit for 5 minutes because beans will be HOT. Serve immediately.

Thursday, April 1, 2010

Macaroni Salad


With all this unseasonably warm weather we have been having in Central Indiana, my husband and I have been befriending our grill yet again for a long season of cooking! Brachts, hamburgers, hot dogs . . my oh my how they do make me smile just thinking of them all! I am usually a healthy eater and watch my portions well, but when it comes to "baseball food" as I like to call it, it becomes a real challenge to control myself. One thing that helps to fill me up is macaroni salad. I have had several versions and this, by far, is one of the best recipes I have come across. Not only does it not have peas in it (yeah, it's by choice) but it is very easy to make with all things I usually tend to have around the kitchen anyways. This time I had some leftover rotini noodles so why not use what I have, right. Not only does this dish make for a fantastic side to any outdoor grill or BBQ, but it also keeps well at room temperature for camping! I am about to go in a few weeks and cannot wait to blog what we cook there out in nature where there are no computers, blogs or recipes. =)

Macaroni (Rotini?) Salad
Adapted from: Sing for your Supper

1/2-3/4 lb pasta shapes (I chose Rotini), cooked and drained
3 small carrots, diced
1 celery stalk, diced
1/2 cup frozen corn, thawed
1 cup cubed sharp cheddar cheese
salt and pepper, to taste
1/2 cup mayonnaise
1/2 cup italian salad dressing
1 tsp dijon mustard

Combine all ingredients in large bowl, cover and refrigerate for at least 1 hour before serving.

Friday, March 26, 2010

Homemade Salsa


If you are a fan of Annie's Eats (and I highly suggest that you become one if you already are not), then you will know this salsa as My Favorite Salsa. I always love going out to Mexican restaurants because of the chips and salsa. Now there is no need because this is so comparable to restaurant quality, but without all of the preservatives and salt. If you haven't guessed already, I don't really like much salt in anything. Well, anyways I went to the grocery store hoping to find big, beautiful jalapeno's like I normally do but this time they were all wrinkly and soft so I opted for getting a pepper that was a bit hotter and using one less. It's okay, I figured, since Brad loves spicy foods. This was great and I will most likely keep some on hand for guests and/or ourselves for snacking from now on! No more store-bought salsa!! If I can just find the perfect queso dip, we probably will never leave home again.

Homemade Salsa
Adapted from: Annie's Eats

1 jalapeno, seeded and coarsely chopped
1 marzano pepper, seeded and coarsely chopped
4 cloves garlic, minced
2 large vine-ripe tomatoes, cubed (large)
1 can diced tomatoes (28 oz), drained for chunky salsa
2 tbsp red wine vinegar
1 tbsp cumin
1/2 red onion, chopped
dash salt
1/2 tsp ground cayenne pepper
1/4 cup fresh cilantro
juice of one lime

In a large food processor, combine the peppers and garlic. Process until finely chopped. You might have to scrape the sides of the bowl to get the excess. Add remaining ingredients and pulse on low speed until salsa is at desired consistency. Transfer to airtight container and refrigerate 2 hours before serving to allow flavors to blend.

Note: I have a very small food processor and combined the first half of the ingredients in the first batch and then pulsed the canned tomatoes and sesasonings in the second batch. Then I mixed everything in a large bowl together.