Wednesday, September 29, 2010

Santa Fe Chicken Salad Wraps


One last delicious summer-style meal that you can make all winter long (pending being able to find good tomatoes). I love the summer but I am more of a fall girl. To tell you the truth, I really could live without air conditioning. Not many people can say that. Well, even though summer is coming to a close I have great plans in store for fall and winter! As my last summer meal, I have made a delicious chicken wrap that I found in a really old magazine (circa 2008) that I've not opened once. I actually made this entire recipe indoors so it could be a fall/winter meal, especially when you get the winter blues and miss summer. That happens to me around early Feburary.

Santa Fe Chicken Salad Wraps
Adapted from: Kraft Food & Family, Summer 2008
Serves: 4-6 people; 8 wraps

2 cooked boneless chicken breasts, cubed
4 cups torn romaine lettuce
1 large tomato, chopped
1 can whole kernel corn, drained (11 oz)
1/2 cup mexican-style shredded cheese
1/4 cup Ranch dressing
1/4 cup salsa
8 flour tortillas, large

To cook the chicken, I baked them in a glass dish, covered in foil (with my preferred seasonings) for around 20-25 minutes at 375 degrees. Make sure the chicken is cooked all the way through and then allow it to cool a bit and cube it. Set aside.

Toss romaine lettuce, chicken, tomatoes, and corn in a large mixing bowl. Sprinkle with cheese. Combine dressing and salsa in separate bowl and pour over romaine mixture. Toss to coat evenly.

Meanwhile, place all of the tortillas on a plate, stacked, and microwave for 25 seconds to heat them. Then, place the romaine mixture on top of each one, dividing equally. Roll up and if needed, keep together with a toothpick. Serve immediately.

Monday, September 27, 2010

Goodfella's Old World Brick Oven Pizza


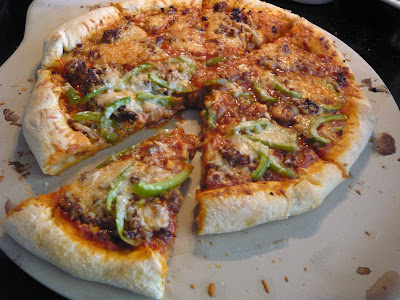
Once in a while I just get overwhelmed with blogging, cooking, baking and taking care of the day-to-day activities that have to get done. My husband can probably only take so much of my cooking anyways (hope not, he seems to love it). We all get those cravings. You know what I'm talking about: delicious and tasty pizza. Sorry Papa Johns, but you are not going to do it for me tonight.

Goodfella's (for short) is a wonderful pizza place really close to our home and I feel extremely blessed to have it so close. A while back I wrote another post on my other blog about Pizzology, which is another fantastic pizza place on the north side of Indianapolis. Both are amazing but I have to say that Goodfella's wins the  pizza battle, hands down. It even tastes perfect a few days later straight from my microwave! This was a perfect football Sunday lunch. Don't worry though, I was on the elliptical for 30 minutes, 6 days this week so I felt like greasy (albeit not too greasy) pizza was warranted.

The pizza is very traditional style in that the crust is a little crunchy, but still thick, and the center is very soft and thinner crust. You even get to watch them toss, knead and cook your pizza in the brick oven. It's pretty amazing. They also always give you bread and some parmesan olive oil dipping sauce that I have got to figure out the recipe for. So if you are ever in town and craving the most amazing pizza of your life, go to Goodfella's and I promise they won't let you down. Now don't forget dessert!!!

NOTE: The website has an incorrect address for the pizza place. The location in Carmel shut down (from what I've been told) and the only location here is at 96th Street & Olio Road, in Geist.

Saturday, September 25, 2010

Baked Stuffed Peaches


If you haven't already scrolled down to the recipe, you have figured out that I made this from a grilling cookbook, but I actually baked them instead. This is a great adaptation if you live in a cold-weather state like Indiana and don't really have access to a grill 365 days a year. On that note, I recently have decided I want to retire to Grand Turk; it's beautiful and the people are amazing. Back to reality though. Winter is coming (not too soon please) and I want to be prepared. I have included both sets of directions for whichever you decide is best for your family. Either way these will be a big hit with kids, adults and even the ones trying to lose weight.

Baked Stuffed Peaches
Adapted from: Low-Fat Cooking on the Grill
Yields: 8 peach halves

4 large peaches
2 Tbsp lemon juice
1/3 cup oats (recipe calls for quick-cooking but traditional works, too)
2 Tbsp firmly packed brown sugar
1 Tbsp almonds, finely chopped
2 Tbsp butter, melted
1/2 tsp cinnamon

(EDIT) Begin by halving the peaches and pitting. Then, in a large pot of boiling water, cook the peaches for no more than 30-45 seconds. This will loosen the skin without actually cooking the peaches. Rinse them in a strainer under cold water and carefully remove the skin. Sometimes they come easier but a paring knive is ideal. To make the peaches lay flat, slice a small thin piece from the backs of the peaches. Place peach halves in a bowl and toss with lemon juice and set aside.

To make the stuffing, combine oats, brown sugar, almonds, butter and cinnamon in a small bowl. Divide this mixture evenly between the peach halves and stuff the centers.

For grilling:
Preheat the grill to medium heat. Spray the grill cooking plate (off the grill) when ready to cook peaches. Place the peaches on the grilling plate, covered, for 5-6 minutes or until they are tender.

For baking:
Preheat the oven to 375 degrees. Place peaches on a silpat lined baking sheet and bake for 8-10 minutes.

Serve warm.

Thursday, September 23, 2010

White Chocolate Macadamia Oatmeal Cookies


If the name of these cookies isn't a mouthful, I'm not sure I know what is. I absolutely LOVE white chocolate and macadamia nuts. If I ever get a choice I will always choose that kind of cookie over any other kind. Locally we have a place called Paradise Bakery and they are known for having amazing cookies. No offense, but these white chocolate/macadamia nut cookies are better than theirs!! I really couldn't taste the oats in them and they cooked and blended well with the other ingredients. Absolutely heaven. I really love that they were a little healthier (hey, you still have to use sugar and chocolate in them) than the normal cookies.

White Chocolate Macadamia Oatmeal Cookies
Adapted from: allrecipes
Yields: 28 cookies

1/2 cup butter, softened
1/2 cup white sugar
1/2 cup brown sugar, packed
1 egg
1 Tbsp vanilla extract
1.5 cups all-purpose flour
1 tsp baking powder
1 tsp baking soda
1.5 cups traditional oats
1 cup white chocolate chips
1 cup macadamia nuts, chopped

Preheat oven to 350 degrees. In the bowl of a stand mixer fitted with the paddle attachment, combine the butter, white and brown sugars until smooth. Add in the egg and vanilla and mix on medium-low until fully incorporated.

In a separate bowl, combine the dry ingredients: flour, baking powder, baking soda. Pour this dry mixture into the stand mixer bowl and mix until well blended. Slowly add in the oats, chocolate chips and nuts. Make sure the mixer is on the lowest setting for this as the batter will thicken some.

Roll batter into small 1-inch balls and place on greased baking sheet (although I highly recommend Silpat mats as I use them for all my baking now). Bake in preheated oven for 12-14 minutes or until edges are golden brown. Keep cookies on baking sheet for a few more minutes to ensure softness and then place on a cooling rack. Store in an airtight container.

Tuesday, September 21, 2010

Pizza Dough

Thanks to Annie (and her amazing blog) I am no longer afraid to make dough at home: pizza dough, pie crust, buns, etc. I can't believe it was this easy and I always have the ingredients in my pantry! Here is step-by-step instructions for my favorite, pizza dough!

First, find some instant yeast (fast-rising). If you are in Indiana and have Kroger, then this is suitable. Normally I buy a different brand but this was all they had at the time.


Next, in a stand mixer with the dough hook, mix the flour, cornmeal, salt, sugar and yeast until mixed well.


Melt your butter and add the water to it.


Then, add that mixture to the bowl of your stand mixer. Mix on low speed until fully incorporated into the dough mixture.


Increase the speed to medium and continue to allow mixer to knead until it forms a dough ball and it starts to pull away from the sides of the bowl. You may need to stop the mixer and scrape the sides and/or bottom occasionally.


Lightly oil a small mixing bowl and place the dough ball into it. Cover with plastic wrap and sit in a warm area (I find window sills with light are the best).


In about 45-60 minutes, the dough will have doubled. Sidenote: I have left it for several hours before and it just continues to rise so don't allow it to sit for too much longer than this.


If you would like to freeze your dough, stop here and wrap the dough in plastic wrap AND place in a ziplock freezer bag. The dough may continue to rise so if it breaks through the plastic, you still have the ziplock for extra protection from freezer burn.

Next, using the softened butter .. laminate the dough. The butter shown below is TOO softened. It should NOT be melted at all.


To laminate the dough, simply roll out the dough on a clean, floured work surface into a 9x2 rectangle. No need to be perfect on this measurement.


Using your fingers, make a 1-inch crust on the outsides of the dough. Then, using a baster, baste the softened butter onto the middle of the dough.


Fold the dough like a three-fold letter.


Pinch the sides of the dough to close and form a ball again.

Allow to rise in same oiled bowl with plastic wrap in the refrigerator for about 40-50 minutes, until doubled.


Once the dough is doubled you can roll it out and place it into your pizza dish, cook and top with your favorite toppings!


Pizza Dough
Adapted from: Annie's Eats, originally Cooks Illustrated
Yields 1 9-inch deep dish pizza crust

1½ cups plus 2 Tbsp all-purpose flour
¼ cup yellow cornmeal
¾ tsp salt
1 tsp sugar
1 1/8 tsp instant yeast
½ cup plus 2 Tbsp water, at room temperature
1½ Tbsp butter, melted
1 tsp olive oil
2 Tbsp butter, softened
 
In a stand mixer with the dough hook, mix the flour, cornmeal, salt, sugar and yeast until mixed well. Then, add your melted butter and water to the bowl of your stand mixer. Mix on low speed until fully incorporated into the dough mixture. Increase the speed to medium and continue to allow mixer to knead until it forms a dough ball and it starts to pull away from the sides of the bowl. You may need to stop the mixer and scrape the sides and/or bottom occasionally.
 
Lightly oil a small mixing bowl and place the dough ball into it. Cover with plastic wrap and sit in a warm area (I find window sills with light are the best). In about 45-60 minutes, the dough will have doubled. Next, using the softened butter .. laminate the dough.
 
To laminate the dough, simply roll out the dough on a clean, floured work surface into a 9x2 rectangle. No need to be perfect on this measurement. Using your fingers, make a 1-inch crust on the outsides of the dough. Then, using a baster, baste the softened butter onto the middle of the dough. Fold the dough like a three-fold letter and pinch the sides of the dough to close and form a ball again.
 
Allow to rise in same oiled bowl with plastic wrap in the refrigerator for about 40-50 minutes, until doubled. Once the dough is doubled you can roll it out and place it into your pizza dish, cook and top with your favorite toppings! Here is a great deep-dish style pizza recipe for you!

Sunday, September 19, 2010

Rosemary Parmesan Chicken Pasta


I used to get the Real Simple magazine at home. Unfortunately I have taught myself to cut back on certain things while I am job-searching. As tough as the market has been, surprisingly, I have not missed too much of my "luxuries" but this magazine sure is one of them. Fortunately for me, right before my last subscription a while back, I received a recipe booklet from them with easy recipes and this was one of my favorites! I did change the recipe around a little because the cheese and chicken liked each other a lot and wanted nothing to do with the pasta. I.e. there were chicken/cheese chunks throughout the dish.

Rosemary Parmesan Chicken Pasta
Adapted from: Real Simple
Serves: 4

12 oz orechiette pasta (or small shells)
3/4 lb boneless, skinless chicken breasts, cooked
2 Tbsp fresh rosemary, chopped
3/4 cup grated parmesan cheese
1/4 cup heavy whipping cream
salt and pepper, to taste

Cook the pasta according to package directions. Meanwhile, shred the chicken with a fork and set aside. Reserve 1 1/4 cups of the pasta water and drain the pasta. Return pasta to the pot and add the rosemary, pasta water, 1/2 cup of the parmesan, whipping cream, salt, and pepper. Mix and heat on medium-low heat until cheese is melted and creamy. Add the chicken last and then cook until warmed thoroughly, about 3-5 minutes. Sprinkle remaining parmesan cheese onto individual pasta dishes and serve immediately.

Saturday, September 18, 2010

Wedding Cake Preservation

Earlier this week my husband and I celebrated our one-year wedding anniversary!! Well first, we celebrated by taking a cruise. It's a paper anniversary so our plane and cruise tickets were on paper. That counts, right?! Also in the name of tradition I decided to dig out our one-year-old cake top. I have to say I was pretty nervous.


We both agreed that it tasted amazing! For as long as I can remember this has been a tradition and some people do it, some don't. I have heard both sides of the story: it tasted just like it was fresh, and that it was disgusting. This one was amazing!!

I am not sure if it was the cake itself or the preservation method but I wanted to share this success with everyone. First, our cake was a buttercream cake with buttercream frosting from a local bakery called Heavenly Sweets. It is also where I got the birthday cake for my moms boyfriend. Second, I do believe that preservation is key to making this a success. This cake never was thawed, never met any liquid and it was immediately frozen the very next day it was eaten at our wedding. My mom kept it until about a month ago and we transported it (in a cooler I might add) to our house.


Upon taking the package apart, this is what I found had been done to preserve this oh-so-delicious cake.

~The cake top itself was sitting on top of a piece of cardboard (probably provided by the bakery).
~The cake top was then set inside of a large paper/cardboard box (shown above).
~The box was then wrapped in 2 layers of plastic wrap allowing no frost to get inside.

To thaw, I simply let it sit, still wrapped, out on the counter all day and we ate it around 4pm on the day of our anniversary. We got married 1 year prior at 6:00pm!


Here is a look at the beautiful cake (that I .. um .. had two pieces of). None of my friends were around so the rest went to waste. I didn't want to ruin a good thing and assume it would stay in the fridge another day. No need to jinx it.

So if you are looking for a do-it-yourself cake preservation method, this one is tried and true!!

Friday, September 17, 2010

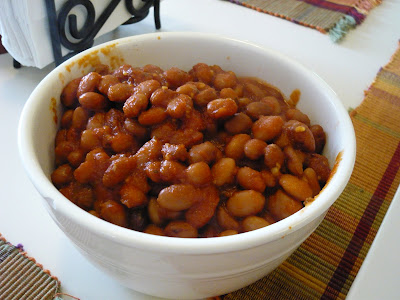
Grilled Beans


For not really ever liking baked beans growing up, I sure do have a lot of recipes on here for beans. Although my traditional baked beans are still my favorite, this goes perfectly with grilled chicken since the sauce is the same and it's oh-so-delicious. I would say these remind me more of fall and the other ones really are a spring/summer dish. These baked beans are so easy to make and really do make a perfect side dish to any BBQ you are planning!

Grilled Beans

1.5 cups tomato sauce (marinara sauce)
1.5 Tbsp finely packed brown sugar
1 Tbsp ginger, grated
1/2 Tbsp red wine vinegar
1 garlic clove, minced
2 cans pinto beans (15-oz each), rinsed and drained

In a small bowl, combine tomato sauce, brown sugar, ginger, vinegar, and garlic. Place mixture into a medium to large saucepan and add the beans. Bring to a slight boil and reduce heat to simmer for 15 minutes, until beans are slightly coated and sauce is thickened.

Pour beans into a disposable foil pan and cover with foil. While grilling chicken or cooking your main meal on the grill, place the beans on the side of the grill for 10 minutes to reheat. Serve warm with grilled chicken!

*Note: If you are making the grilled chicken recipe, the sauce measurements for that are enough for both the chicken AND the beans. I halved this recipe in case you are only making these beans by themselves.

Thursday, September 16, 2010

Texas Barbecued Chicken


I love chicken. I've never really admitted this, but I only really like the boneless, skinless chicken breasts. They are just so much easier to work with and I feel like you get more meat out of it; there are just too many fatty parts of a chicken leg. Against my better judgement I decided to tackle the bone-in chicken for once. I knew I couldn't fry it. One, I don't have the patience for that, and two, I've attempted it so many times I know when to admit defeat. Well grilling is much easier, but still takes a very long time. The recipe said to grill them for 20 minutes but we cooked them for about 35 minutes and they still weren't totally done. Unfortunately for us, the gas went out on the grill right at that time so that's what we had to work with. I think this would be a great recipe for wings, though. The sauce is AMAZING!

Texas Barbecued Chicken

3 cups tomato sauce (marinara sauce)
3 Tbsp firmly packed brown sugar
2 Tbsp ginger, grated
1 Tbsp red wine vinegar
2 garlic cloves, minced
4 whole chicken legs (2 lbs total), split and skinned

Preheat the grill to medium heat. When ready to cook, spray the rack off the grill with cooking spray to prevent sticking.

In a small bowl, combine tomato sauce, brown sugar, ginger, red wine vinegar, and garlic. You can use 1.5 cups of the mixture to make a side of beans with (recipe here). The rest is used for coating the chicken.

Grill the chicken, covered, turning occasionally and basting with the remaining tomato sauce. Continue to cook for 15-20 minutes on medium heat and then turn the heat up to medium-high for another 15 minutes, or until the chicken is cooked thoroughly.

Note: You can also make sure that your grilled chicken is always done inside by cooking them prior to grilling in a crockpot or boiling on the stove. Be sure to not over-cook them though. You will want to cook 3/4 of the way and then grill the rest. This significantly cuts down on grilling time (and I always do it for my ribs).

Sunday, September 5, 2010

Old-Fashioned Coleslaw


Travel Note: My husband and I will be on a cruise this week celebrating our one year anniversary. Today we will be enjoying Half Moon Cay, Bahamas.

It's almost that time of year again .. Fall. I have yet to meet someone who doesn't like fall. My husband only likes it because of the food and the weather; otherwise he hates that the next season is his least favorite: winter. Let's not rush that one, though. Fall reminds me of gourds, pumpkins and more fun flavors. One that I have yet to try (and that I have protested all my life) is coleslaw. I never eat it when it comes on the side at a restaurant. I never have made it before. Although this recipe needed some tweaking (I used a LOT less mustard), it was a pretty good start to a classic dish. I am trying to eat healthier now and vegetables are one category that I like to not veer from my "norms". This was one recipe I'm sure glad I didn't pass up.

Old-Fashioned Coleslaw

3/4 cup plain nonfat yogurt
2 Tbsp reduced-fat mayonnaise
2 Tbsp cider vinegar
1/2 Tbsp dijon mustard
1/2 tsp salt
1/4 tsp freshly ground black pepper
1 head cabbage, shredded
2-3 carrots, shredded

In a large bowl combine all ingredients except cabbage and carrots. Mix well. Add cabbage and carrots and toss to combine evenly. Cover and refrigerate before serving. Best if eaten same day for crisp cabbage.

Friday, September 3, 2010

Pink Martinirita


Everyone needs a quick go-to drink for any occasion. I stumbled upon this drink by a friend and it was unbelievably good!! It is an alcoholic drink, so if you are a non-drinker (or expecting) then you may very well make this to sip on without the alcohol. I have tried the alcoholic version and it is fabulous. It is also cute and pink so would go well with a bridal shower theme or even a girl's baby shower (the non-alcoholic version for the mom-to-be). I also found out a few weeks after having the drink that it's actually called Skip and Go Naked.

Pink Martinirita
Adapted by: Kelly's Kitch original

1/2 can frozen pink lemonade
1/4 cup vodka
3/4 cup beer (sounds gross but don't skip this)
ice

Blend all ingredients together (filling ice to almost the top of the blender) until pureed. Enjoy a non-alcoholic version by simply omitting the alcohol and it's still a delicious treat!

Wednesday, September 1, 2010

Carrot and Zucchini Bars


If you need to hide your vegetables to eat them, here is your recipe! I love my veggies, however, my husband will not eat anything green .. no matter what. This is such a delicious (albeit not the healthiest) way to get your vegetables in and dessert. I have always had a huge crush on carrot cake; I even insisted that I get a side sheet cake at my wedding just so I could have carrot cake. This is also a great recipe for carrot cake if you wanted to experiment around with it. The cream cheese frosting was the perfect amount of sweetness to top off the bars, too. I probably will make 1.5x the batch next time because I have a huge sweet tooth. The recipe below is the original amount.

Carrot and Zucchini Bars

For the bars:
1.5 cups all-purpose flour
1 tsp baking powder
1/2 tsp ground ginger
1/4 tsp baking soda
2 eggs, slightly beaten
1.5 cups shredded carrot
1 cup shredded zucchini
3/4 cup brown sugar, packed
1/2 cup dry cranberries (or raisins)
1/2 cup walnuts, chopped
1/2 cup cooking oil (I used canola)
1/4 cup honey
1 tsp vanilla

For the frosting:
8 oz cream cheese, softened
1 cup powdered sugar
1 tsp lemon zest

Preheat oven to 350 degrees. In a large mixing bowl, combine flour, baking powder, ginger and baking soda. In a separate bowl, mix remaining ingredients (for the bars) until well blended. Pour that mixture into the large mixing bowl with the dry ingredients. Mix until just incorporated. Spread batter evenly into an ungreased 13x9-inch baking pan. Bake for 20-25 minutes, until a toothpick comes out clean. Cool bars in the pan on top of a cooling rack.

While bars are cooking, mix cream cheese and powdered sugar together in a stand mixer on medium speed with the wire whip attachment. Whip frosting until fluffy and add the lemon zest. Mix batter for another minute and spread over cooled bars. Cut into bars and serve!