Friday, December 31, 2010

Two Bean Turkey Chili


My pictures sure could use some dSlr help. If you want to see a more appetizing photo, click the link below for the original recipe. That picture is what got my attention. Plus I was needing a new crock pot recipe as all of mine have been done over and over again. Even though I had to cook 2 pounds of ground turkey at 6:30 in the morning before leaving for work (GAG!), it was worth the wait at the end of the day. I thought the chili would be dry or bland but it was nothing of the sort. It was actually very delicious and we ate the rest for leftovers. I would probably use a little less juices next time (maybe drain some of the cans) and cut the recipe down. We had 5 servings and I ended up throwing a good portion down the drain afterwards. It just makes way too much, even for leftovers, with only two people in this house. I've reflected a few of the changes below. I also had to rename it since next time I will only use two types of beans. ;)

Two Bean Turkey Chili
Adapted from: Smells Like Home, originally Gina's WW Recipes
Yields: 8-10 servings

1 ½ lb ground turkey
½ small onion, chopped
1 can diced tomatoes (28 oz)
1 can tomato sauce (16 oz)
1 can chopped chilies, drained (4.5 oz)
1 can chickpeas, drained (15 oz)
1 can black beans, drained (15 oz)
2-4 tbsp chili powder, depending on preference
½ tsp ground cumin
½ tsp ground coriander
¼ tsp garlic powder
½ tsp Kosher salt
¼ tsp freshly ground black pepper

In a skillet on medium heat, cook the ground turkey until cooked thoroughly. Drain and place in the crockpot with all other ingredients. Mix well and cook in crock pot on medium to low for 6-8 hours.

Thursday, December 30, 2010

Strawberry Ice Cream


Even if it is winter and there's snow on the ground, a girl's got to have her ice cream. Strawberry is my absolute favorite kind .. of anything! I grew up on strictly a strawberry ice cream diet (for dessert anyways). Nothing else compared. Boy oh boy am I glad my husband got me an ice cream maker for Christmas. This strawberry ice cream is THE BEST ice cream I've ever tasted .. including the famous Handel's. Yes, I'm sorry to tell them but I have found a better recipe.

 I also got David Lebovitz's book with several ice cream recipes in it, but I tried one (chocolate) and it turned out way too overly-chocolate. I'm still hesitant to try another one. All of his strawberry recipes called for vodka, which I can't have right now because as most of you know, I'm a little over 3 months pregnant. I will try some others, probably sorbets which are my favorite (you know, besides strawberry ice cream).

Strawberry Ice Cream
Adapted from: Cuisinart (the recipes that came with the machine)
Yields: 1 quart ice cream

1 ½ cups fresh or frozen strawberries (slightly thawed)
¾ cups whole or 2% milk
2/3 cup granulated sugar
Pinch salt
1 ½ cups heavy whipping cream
1 ½ tsp pure vanilla extract

Hull the strawberries if they are fresh or allow them to thaw most of the way if frozen. Put the strawberries into a food processor or blender and chop until finely pureed. Reserve in bowl.

In a medium bowl, using a hand mixer on low speed, whisk the milk, sugar and salt until combined and sugar is dissolved. Stir in the heavy cream and vanilla and continue to mix well. Add the reserved strawberries with all the juices until well incorporated. You may cover and chill at least 1 hour or go ahead and make the ice cream immediately.

Using the manufacturer’s instructions, pour the ice cream into the ice cream maker for 15-20 minutes or until desired consistency. Transfer to an airtight container and store in the fridge. Ice cream will solidify more with being in the freezer.

Friday, December 24, 2010

Classic Cheese Ball


MERRY CHRISTMAS EVE!!

If you have ever been to a dinner party without a cheese ball, I apologize. Cheese balls are the quintessential appetizer and have been for decades. I love most cheese balls, but there have been a few I didn't quite like. I wanted to be sure to make one that was amazing and beautiful, too, for our family Christmas dinner. I found a recipe that looked like a winner online and amazingly enough it turned out great. I will adapt it next time with different cheeses and maybe even use grated instead of shredded cheese, too. Adapt it how you want, but try the original first because it's surely a winner!

Classic Cheese Ball
Adapted from: About.com
Yields: 1 large cheese ball

18 ounces cream cheese, room temperature
8 ounces shredded or grated cheddar cheese
2 tsp grated onion
2 tsp worcestershire sauce
2 tsp minced garlic
finely chopped pecans

In a large mixing bowl, combine all of the ingredients except pecans. Mix well with a hand blender to make sure everything is uniform throughout. Roll into a ball using plastic wrap and store in the fridge for 1 hour. Remove ball from plastic wrap and roll in chopped pecans to cover the surface. Rewrap cheese ball in clean plastic wrap and store in the fridge until the day you are serving it. Set cheese ball out 2 hours before guests arrive. Serve alongside a variety of crackers.

Wednesday, December 22, 2010

Deviled Eggs


Deviled eggs are a classic (and easy) addition to any get-together. These work especially well for Christmas and Thanksgiving because you can easily prep them the day before and just store in the fridge until everyone is ready to eat. My mom gave me this recipe because she absolutely makes the BEST deviled eggs, hands down. A lot of people just cut the hard boiled eggs in half but I think that tastes gross and it has a really dry texture. This method utilizes ingredients everyone always has on hand and it's extremely easy to make.

Deviled Eggs
Adapted from: Kelly's Kitch Original
Yields: 16 deviled eggs

8 large eggs, uncooked
mayonnaise, to taste
mustard, to taste
nutmeg, for sprinkling

To hard boil the eggs, place them in a large pot full of enough cold water so they are covered. Be sure there is a little extra water on top as well. Place pot on the stove and boil for 12 minutes and then remove pot from hot burner, place a lid on top and let sit for 8 minutes. Meanwhile, prepare a cold water bath in a large bowl (cold water and ice). Place the eggs in the cold water bowl and let cool down for approximately 5 minutes.

Once eggs are cool enough to handle, gently (VERY gently) crack the egg shell by lightly tapping it against the countertop or another flat surface. When the egg shell cracks, carefully peel away the shell and clear layer underneath to expose the hard boiled egg. Repeat with remaining eggs.

Cut eggs in half lengthwise and place all the yolks in a medium mixing bowl. Add about 4 Tbsp mayonnaise and 2 tsp mustard to start. Mix with the yolk, being sure to break the yolk up well. Taste for consistency. Add more mayonnaise or mustard as desired. Fill the egg halves with the mixture and sprinkle with paprika for effect.

Monday, December 20, 2010

Chocolate Chip Cookies


Chocolate chip cookies are such a classic cookie to make. There are always several variations and I can never quite get them the way I like (soft, chewy and the chocolate melty). That is, until now! I simply used a recipe my friend gave me for peanut butter chocolate chip cookies and simply just used chocolate chips instead. It turned out great and unfortunately nobody got to taste them but my husband over the course of that week. ;) I guess it's a good thing he has a gym membership or we'd really be in trouble.

Chocolate Chip CookiesAdapted from: a friend
Yields: 2 dozen cookies

2 sticks butter, softened
3/4 cup granulated sugar
3/4 cup brown sugar
1 tsp vanilla
2 eggs
2 3/4 cup flour
1 tsp baking powder
1 pkg chocolate chips (about 12 oz)

Blend butter, sugars, eggs, vanilla and baking powder in large bowl. Mix in flour and gently add the chips. Refrigerate for a few hours (optional, but helps to roll dough later).

Roll dough into balls and place on greased cookie sheet. With palm of hand or a flat spatula, flatten dough balls down. Bake at 350 degrees F for 15 minutes or until edges are a light golden brown. Remove from baking sheet to cool.

Friday, December 17, 2010

Stove Top Mac N Cheese


Mac and cheese is always a welcomed guest in my home. I like to dress it up, keep it basic and even throw in some meat once in a while. That is exactly what I did with this recipe. It’s a great side dish as-is, but I wanted to just have it for dinner. Since my husband won’t eat anything without meat, I thought ham chunks would go over well; and they sure did! He didn’t complain or even suggest (as he has in the past) about this not being “a real main dish.” As a side dish, however, this would be fantastic for a weeknight dinner or even something easy for New Years.

Stove Top Mac & Cheese
Adapted from: Homemade by Holman, originally Food Network
Serves: 6-8

14 oz pasta shapes (I used rotini)
3 Tbsp butter
2 eggs
9 oz evaporated milk
½ tsp hot sauce
½ tsp mustard
½ tsp dried thyme
2 ½ cups sharp cheddar cheese, shredded
salt and pepper, to taste

Cook the noodles according to package directions. Cook to al dente and drain. Reduce heat to medium-low and return the pot to the stove. Add butter and melt with pasta. Whisk together eggs, milk, hot sauce, mustard, thyme, salt and pepper and pour mixture over top of pasta. Stir and cook about one minute. Add cheese and stir constantly to melt and incorporate well. Cook an additional 2 minutes and add more salt or pepper later if needed. Serve warm.

Wednesday, December 15, 2010

Soft Spritz Cookies


I’ve never made spritz cookies before, but I sure have eaten them. They are always very delicious and soft and just a little flaky. I wanted to make a perfect recipe but I knew that I would have to start small and tweak it as I went. This is a fantastic recipe to start with and I might add a little more almond extract or more vanilla extract next time. Other than that, these cookies were easy to work with and baked perfectly (even without my trusty Silpat). One change I did make in the directions below was to dye the cookie dough before adding the dry ingredients. That way, it has more of a chance to incorporate and you don’t get chunks of dye like I did the first time.

Soft Spritz Cookies
Adapted from: All Recipes
Yields: 4 dozen cookies

1 cup butter, softened
1 ¼ cup powdered sugar
1 egg
1 tsp vanilla extract
½ tsp almond extract (more if desired)
2 ½ cups all-purpose flour
½ tsp salt
food coloring (optional)

In a mixing bowl of a stand mixer, cream together butter and sugar until smooth on medium speed using the paddle attachment. Beat in the egg and extracts. Add food coloring if desired (mixture will be darker than cookies will come out). In a separate bowl, combine flour and salt. Gradually add to the creamed mixture on low speed. Switch to the dough hook about halfway through the flour mixture.

Using a cookie press fitted with the disc of your choice, press as much dough as will fit into the tube. Follow manufacturer’s instructions on how to press and bake 2-inches apart on an ungreased cookie sheet. Bake in a preheated oven at 375˚F for 6-8 minutes until set (do not brown). Allow cookies to cool for 3-5 minutes on cookie sheet and transfer to wire rack to cool completely.

Monday, December 13, 2010

Apple Cream Cheese Danish


By far this was the sweetest food item that I’ve ever made, to date. Usually sweet is not a bad thing either with me or my husband. This time, however, it was a bad thing. This Danish was absolutely fantastic, except that it had way too much icing on top. Next time (I’ve reflected the change in the directions below to save some of you from several dentist trips), I will not do the glaze but just the drizzle and use only a half recipe at that. I guarantee it will taste a hundred times better that way. The way it was, we couldn’t even finish eating them and normally I love pastries. The filling though was the best part, by far, of this entire recipe. It tasted absolutely amazing! This is a recipe that is time consuming, but it’s so very much worth it in the end.


Apple Cream Cheese Danish
Adapted from: Annie’s Eats, originally Baking Illustrated
Serves: 6-8

For the dough:
1 ½ cups all-purpose flour, extra for rolling
1 ½ tsp instant yeast
¼ cup sugar
¾ tsp salt
1/3 cup whole milk
1 large egg, slightly beaten

For the butter square:
12 Tbsp cold unsalted butter cut into 1-tablespoon pieces
1 Tbsp all-purpose flour

For the cream cheese filling:
4 oz cream cheese, softened
¼ tsp lemon zest, fine
2 Tbsp sugar

For the apple filling:
1 Tbsp butter
2 medium apples, peeled and sliced thin
2 Tbsp sugar
¼ tsp ground cinnamon
pinch grated nutmeg

For the drzzle:
1 cup powdered sugar
1 Tbsp milk, plus more if needed

To make the dough, combine 1 ¼ cups of the flour, yeast, sugar and salt in a mixing bowl. Place the milk and eggs in the bowl of an electric mixer and beat with the dough hook. With the mixer on low, slowly add the flour mixture and continue to knead until a smooth dough ball forms, about 8 minutes. Check to make sure the dough is sticky but doesn’t stick to the bowl. If needed, add more flour 1 tablespoon at a time. Wrap the dough in plastic wrap and refrigerate for 1 hour.

To make the butter square, combine the flour and butter on a clean work surface. Mix together with a bench scraper (or similar tool) until uniform. Wrap the combined butter mixture loosely into plastic wrap and form into a 5-inch square. Place in the fridge until firm, at least 30 minutes.

Place the dough onto a well-floured work surface and roll into a 9-inch square. Remove the plastic wrap and place the butter square diagonally on top of the dough, with each of the four corners of the butter square pointing towards the corners of the dough. Fold all four corners of the dough into the middle and pinch together all the seams. Take a rolling pin and tap the dough horizontally from the center out to make the butter soft and more malleable. Gently roll the dough into an 11-inch square, re-flouring the surface as needed.

Fold the dough into thirds, vertically like a brochure or business letter. Repeat the folding but in the other direction so you end up with a square again. Wrap the dough in plastic and refrigerate for 2 hours. Roll dough out into an 11-inch square and repeat the folding process and wrap and refrigerate. Keep in the fridge overnight or for at least 4 hours.

To make the cream cheese filling, combine the cream cheese, lemon zest and sugar in a small bowl. Mix well until blended together and smooth. Keep refrigerated until ready to use.
To make the apple filling, melt butter in a large skillet over medium heat. Combine and add the apple slices, sugar, cinnamon, and nutmeg and mix well. Cook until most liquid has evaporated and apples are tender, about 15-18 minutes, stirring occasionally. Let cool before using.

Roll the refrigerated dough into a 14-inch square on well-floured parchment paper. Spread the cream cheese filling down the middle third of the dough. Lay the apple mixture on top of the cream cheese filling. Using a pizza cutter, slice the outer thirds of the dough into ¾-inch strips diagonally downward. When looking at the dough, the strips should be pointing down and to the left and right sides. Then, carefully fold the strips, alternating sides, across the middle third of the Danish. This will make a braided pattern.

Transfer braid and parchment paper to a baking sheet. Cover loosely with plastic wrap and let rise for 30 minutes. Preheat the oven to 400˚F. Bake 22-26 minutes, rotating halfway, until the braid is golden brown. Allow to cool on a wire cooling rack.

To make drizzle, combine ingredients in a small mixing bowl until smooth. Add 1 tablespoon of milk at a time as needed to make it a drizzly consistency. Drizzle the Danish with the drizzle mixture, only using as much as you see fit. I think half would work perfectly.

Friday, December 10, 2010

Cran-Blueberry Pie


I’ve never really liked cranberry sauce because of its tanginess. If they are mixed with a very sweet berry, however, they taste absolutely wonderful. I think that is what makes this pie irresistible. I made it a few weeks ago and I loved it so much I’m going to make another one for my family Christmas dinner (that my dad volunteered me to host this year). The main problems with my hosting a big family dinner is: stress and picking out food. I don’t know what everyone will like and I want to go out of the ordinary but I’m afraid people won’t eat anything or will complain. This year I’m going traditional with a few out of the ordinary extras. This will be something my family has never eaten and I can’t wait to see their faces!

Cran Blueberry Pie
Adapted from: Annie’s Eats, originally Bon Appétit
Yields: one 9-inch pie

For the filling:
16 oz frozen blueberries (do not thaw)
12 oz frozen cranberries (do not thaw) *
1 ¼ cup sugar
3 Tbsp cornstarch
2 cinnamon sticks, or 2 tsp ground cinnamon
1 Tbsp lemon juice
½ tsp finely grated lemon zest

For assembling:
2 9-inch pie crusts
ground nutmeg, for sprinkling

To make the filling, combine the blueberries, cranberries, sugar, cornstarch, cinnamon sticks (or ground cinnamon), lemon juice and zest in a large saucepan. Cook over medium-high heat until the mixture has thickened and begins to boil, stirring constantly, about 14 minutes. Once the mixture begins to boil, continue to boil for an additional 2 minutes, stirring constantly. Transfer the mixture to a bowl and allow it to cool completely before proceeding.

Preheat the oven to 400˚F. Roll out one of the pie crusts to a 12-inch round. Line a 9-inch pie plate with the crust. Remove cinnamon sticks, if using, from the cooled mixture. Then, spread the filling onto the bottom crust in the pie plate. Roll out the second piece of pie crust into a 12-inch round and either cut strips for a lattice crust or place loosely on top of pie and cut slits in the top. Cut off excess crust and pinch the edges together and use your fingers to make a fluted pattern. Sprinkle nutmeg on top crust and bake in the oven for 60-70 minutes, rotating halfway. Be sure to place a drip pan underneath in the oven because this pie will get messy towards the end of the baking time. If the crust is browning too quickly, place foil around it and continue baking normally. Allow pie to cool on a wire rack and serve warm or at room temperature.

*If you can't find already frozen cranberries like I couldn't, then you can buy a 12 ounce package of cranberries in the produce section of your local store and keep in the freezer for this recipe.

Wednesday, December 8, 2010

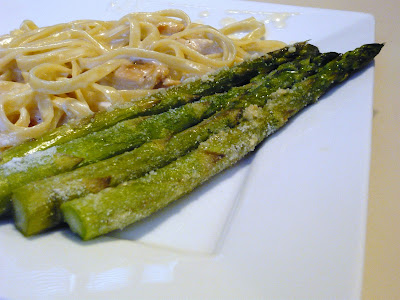
Baked Parmesan Asparagus


Asparagus is one of those vegetables that my mom tried to force on me as a child once and only once. I despised how it smelled and looked so much that I would have done (and probably did do) anything to avoid eating it. Luckily I have had some recipes recently that have called for asparagus and I can’t believe what I was missing out on! Asparagus is so healthy, delicious and extremely easy to make. If you need a side dish to your Christmas dinner, this would be a very easy and very beautiful display for the table.

Baked Parmesan Asparagus
Adapted from: All Recipes
Yields: 10 spears, about 3-4 servings

10 medium fresh asparagus spears, trimmed
4 tsp olive oil
1 Tbsp parmesan cheese, grated
1/8 tsp garlic salt

Toss the asparagus spears on a non-stick or greased cookie sheet with the oil. Bake in a preheated oven at 440˚F for 12 minutes, being sure to toss at the halfway point. Meanwhile combine parmesan cheese and garlic salt. When asparagus is done cooking in the oven and is tender, sprinkle with parmesan mixture and serve warm.

Monday, December 6, 2010

Grilled Chicken Quesadillas


One menu item I have never tried to make at home would be a quesadilla. For one, they look very hard. Also, I never really liked them enough to try it. I have been running out of dinner ideas lately (hint: in need of cook books), so I decided to give it a try. I’m glad I did because these quesadillas were absolutely amazing fresh and tasted even better reheated! I love foods that I can heat up for leftovers. Some foods stay well and some don’t. These do and they are a great weeknight meal, even if you do end up with a lot of leftovers.
Grilled Chicken Quesadillas
Adapted from: Annie’s Eats, originally Confections of a Foodie Bride
Serves: 4

1 Tbsp chili powder
2 Tbsp fresh cilantro, minced (optional)
1 Tbsp olive oil
juice of 1 lime
dash salt
1 tsp cumin
½ tsp red pepper flakes
2 boneless, skinless chicken breasts, halved lengthwise
½ yellow onion, chopped
2 tomatoes, seeded and diced
corn tortillas (6-7 inch)
cooking spray
shredded cheese

Heat a grill pan or skillet over medium-high heat. In a pie plate, combine the chili powder, cilantro, olive oil, lime juice, salt, cumin and red pepper flakes. Whisk to combine and coat the chicken halves in the mixture. Cook chicken until browned on both sides and is no longer pink inside. Remove from heat and shred the chicken once cooled. Add the onion to the pan and cook until tender, about 5 minutes.

In a medium mixing bowl, combine the chicken, onion, and diced tomatoes. Toss well. Lightly brush or spray one side of a tortilla with vegetable oil. Flip over on a clean work surface so that the oiled side is down. Place a quarter cup of chicken mixture onto tortilla and spread evenly. Sprinkle shredded cheese on top. Fold tortilla over to sandwich the filling like a taco.

Cook the assembled quesadilla over medium-high heat in a lightly oiled grill pan or skillet until browned on the outside and cheese is melted on the inside. Slice into wedges and repeat with remaining tortillas and chicken mixture. Serve warm with sour cream and salsa.

Friday, December 3, 2010

Baked Oatmeal


Oatmeal is something I never really liked as a child but like many of my dislikes, I have grown to like it as an adult. I still cannot eat plain, tasteless oatmeal though. This is a great way to get your fiber and other nutrients in in the morning with wonderful taste. I made this for a pitch-in and I got some good comments on it. It wasn’t the sweetest oatmeal in the world, but I think the extra apples really helped to pull it together. This would be a fantastic breakfast for Christmas morning with the family since there is very little prep and you can just leave it in the oven while you open gifts!

Baked Oatmeal
Adapted from: Proceed with Caution
Serves: 8-10

2-3 apples, cored and chopped
1 cup fresh or dried cranberries
½ cup unsweetened applesauce
3 cups quick cooking oats
4 ¼ cups milk
1 egg
½ cup pure maple syrup or agave nectar
2 tsp baking powder
½ tsp salt
1 tsp cinnamon
3.4 cup chopped nuts
1 tsp vanilla extract

Combine all ingredients in a casserole dish and be sure to mix will. Mixture will be very thin but as it bakes, it will thicken. Bake uncovered at 350 degrees for 45 minutes.

If you are strapped for time in the morning, you can make this dish the night before and store it in the fridge until you bake it in the morning.

Wednesday, December 1, 2010

Orange Chicken


"If you can make Kung Pao Chicken like this, we won't ever have to go out to a Chinese restaurant again." The words of a wise and very happy husband!! I saw this recipe online and even though I consider myself a HUGE follower of Annie's Eats, I just had to try it anyways. I know a lot of my recipes are from her website but I just don't have nearly enough cookbooks or experience to be able to do things like this on my own yet. I'll be honest in that I was very nervous about deep frying the chicken pieces coated in cornstarch but it worked out amazingly and I wouldn't do it any other way! If you like orange chicken (or you are even on the fence about it), this recipe will change your world, promise. This recipe is actually supposed to be a knock-off to Panda Express and I can say (since I eat there a lot) that this recipe is MUCH MUCH MUCH better than theirs!

Orange Chicken
Serves: 4-6

For the marinade and sauce:

¾ cup chicken broth
¾ cup freshly squeezed orange juice
1 ½ tsp finely grated orange zest
6 Tbsp white vinegar
¼ cup soy sauce
½ cup brown sugar, packed
3 cloves garlic, minced
1 Tbsp fresh ginger, grated
¼ tsp cayenne pepper
1 ½ lbs boneless skinless chicken breasts, chopped into 1-inch bite-sized pieces
1 Tbsp plus 2 tsp cornstarch
2 Tbsp cold water
8 thin strips orange peel (optional)

For coating and frying:
3 large egg whites
1 cup cornstarch
½ tsp baking soda
¼ tsp cayenne pepper
3 cups peanut or canola oil

To make the marinade and sauce, combine the chicken broth, juice, zest, vinegar, soy sauce, brown sugar, garlic, ginger and cayenne pepper in large saucepan. Whisk to blend well. Set aside ¾ cup of the mixture and transfer to an airtight tupperware container. Add the chicken pieces to the tupperware, seal and refrigerate about 30-60 minutes (no longer).

Place the saucepan on the stove and heat over medium-high heat, bringing to a simmer. In a small bowl, whisk together cornstarch and water until well incorporated and add it to the saucepan. Continue to simmer until the sauce thickens and becomes translucent, about 1 minute. Remove from the heat and stir in the orange peel, if using.

To prepare the coating, place egg whites in a pie plate and whisk until frothy. In a second pie plate, combine the cornstarch, baking soda and cayenne pepper. Whisk to blend well. Drain the chicken from the tupperware container in a strainer in the sink, but BE SURE TO SAVE THE SAUCE! To do this most effectively, pick out the chicken pieces with a slotted spoon or tongs. Pat dry with a paper towel (they don’t have to be perfectly dry). Place half of the chicken in the egg whites and turn to coat. Transfer them to the second pie plate with cornstarch mixture and set aside on a clean plate. Repeat with second half of chicken pieces.

To fry the chicken, heat oil in an 11- or 12-inch round dutch oven or straight-sided sauté pan until the oil reads 350 degrees F. Use a candy thermometer to read this. Carefully (without splattering hot oil) place half of the chicken pieces in the oil and fry until golden brown, about 5 minutes. Be sure to flip them about halfway through the cooking time. Remove from the oil with a metal skimmer and transfer to a paper towel-lined plate. Return the oil to 350 degrees and repeat with remaining chicken pieces.

If desired, place cooked chicken pieces back into the saucepan with the orange sauce and heat on low a few minutes to reheat the sauce. Serve over a bed of white rice.

Monday, November 29, 2010

Caesar Salad Pizza


Caesar salad is my number one favorite kind of salad. It's usually pretty consistent on the toppings and the wonderful flavor of the dressing is amazing, too. I have made other pizza crusts before but this one is very doughy and tastes just like bread you would serve with a normal side caesar salad. It's not like my deep dish pizza crust or anything close to it. I did roll these crusts out thinner because they looked too thick compared to the picture on the website. They did, however rise a little more than I would have hoped so I will probably make them even thinner next time. Don't be afraid to roll the dough thinner than you normally like it; it will turn out perfect! Also, feel free to add or omit toppings you like on your salads. I added chicken to make this a more wholesome dinner.

Caesar Salad Pizza
Adapted from: Annie's Eats, originally The Pastry Queen
Serves:6-8

For the crust:
1 ½ cups warm water
5 tsp instant yeast
2 Tbsp olive oil, plus more for brushing
2 tsp honey
4-5 cups all-purpose flour
1 tsp salt
½ tsp red pepper flakes
¾ cup coarse cornmeal
freshly shredded parmesan cheese

For assembly:
Caesar dressing
1 large head Romaine lettuce, washed and chopped
1 pint cherry tomatoes, halved
garlic croutons
Parmesan shavings

To make the crust, combine the water, yeast, oil, honey and 3 cups flour in the bowl of a stand mixer fitted with the dough hook attachment. Add the salt and red pepper flakes. Mix on low speed until combined. Add 1 more cup of the flour and mix until soft. Mix on low speed for 5 minutes to knead. Add the rest of the flour 1-2 Tablespoons at a time (as needed) until the dough is smooth and tacky but not sticky.

Coat 2 baking sheets with olive oil (or preheat a pizza stone, unoiled). Preheat oven to 450 degrees F. Sprinkle baking sheet(s) with cornmeal. Divide the dough into 4 equal pieces (use only those needed, freeze the rest in plastic wrap and a ziploc bag). Cover the dough with a damp towel and let sit for 10 minutes, until the oven heats up.
With a rolling pin, flatten dough ball into 10-inch circle on well-floured surface. Brush each dough with olive oil and sprinkle with parmesan cheese. Transfer to prepared baking sheet or stone and bake until lightly golden and crisp, about 10-15 minutes.

To assemble the salad, combine lettuce, tomatoes and dressing (as desired) in large mixing bowl. Toss to coat evenly and place a generous amount on cooked, warm pizza crust. Top with parmesan cheese and croutons as desired.

Friday, November 26, 2010

Pot Roast


Welcome to Black Friday 2010! While out shopping, why not throw something in the crock pot for when you come crawling in the door late afternoon, exhausted from fighting other people to get that $40 Tom Tom. Getting your toes stepped on 50 times, getting pushed so many times that you become numb to it, and standing out in the blistering cold with nothing to do; now that's Black Friday. You should come home to a wonderful (and warm) dinner that you "slaved over" all day to make. ;)

Pot roast has always been a staple in our house growing up and still is today! This is by far the easiest recipe (thank you, mr. crock pot) and one of the first that I ever learned how to make. The beef comes out so juicy but tender (I've tasted some dry roasts before, yuck) and the veggies complement it very well. My husband also requested some bread and butter on the side this time. We had some on hand and the loaf must've caught his eye. This would also work well with just about any dinner roll, too.

Pot Roast
Kelly's Kitch Original
Serves: 4

2-4 pound boneless pork rump
3 large potatoes, peeled diced into 1-inch pieces
4-5 large carrots, peeled and chopped into 2-inch-long pieces
1 can mushroom soup
2 Tbsp Italian seasoning

Place all ingredients into crock pot and fill it with enough water to just cover the roast. Mix the soup and spices in well. Cook on low for 8-10 hours. Use a slotted spoon to dish out the meat and place on a separate plate, dividing into equal-sized portions. Using the slotted spoon, scoop out potatoes and carrots and place on serving dishes with the meat. Enjoy!

If you want to save the roast for leftovers/lunch the next day, place into airtight tupperware container and spoon in some of the crock pot liquid to preserve the moisture.

Wednesday, November 24, 2010

Traditional Lasagna


I posted this in the early Kelly's Kitch days and the picture was very, well, drab. It wasn't very enticing and you really couldn't see anything but the cheese on top. Since then I have gotten much better at using my point-and-shoot camera to compete with the "professional" bloggers that use a dSLR camera. They just make it look so incredibly easy! Well given my camera, I'm quite proud.

When all else fails for dinner and I really can't think of anything to cook, I always reach for this recipe that my mom handed down to me. It is a no-fail and delicious dinner .. no matter what. I just am getting lazier with my cooking (in my eyes anyways) and don't want to make sides. However, this would go very well with traditional garlic bread, breadsticks, or even cheesy garlic bread.

Traditional Lasagana
Kelly's Kitch original
Serves: 6-8

1 pound ground beef
1 can tomatoes
1/2 cup onions, chopped
1 can tomato paste (6 oz)
1/3 cup water
1 garlic clove, minced
1/4 tsp pepper
1 tsp oregano
1/4 lb lasagna noodles, cooked
8 ounces mozzarella cheese
1/2 tub ricotta cheese (4 oz)
parmesan cheese

Boil and drain the lasagna noodles according to package directions until al dente. Set aside.
Meanwhile, brown meat in large skillet. Add the onion and cook until tender (about 4-5 minutes). Stir in tomatoes, paste, water, garlic and seasonings. Cover and simmer on low 25 minutes. In a 12x8 greased baking dish, layer the lasagna in this order: noodles, meat sauce, racotta cheese, parmesan cheese, mozzarella cheese. Repeat the layers. Bake uncovered in preheated oven at 350 degrees for 25 minutes.

This recipe makes two layers. Double it for a deep-dish three layered lasagna for a large party!

Monday, November 22, 2010

Roast Chicken with Caramelized Shallots


Rare is it when I make chicken that isn't boneless and skinless. These bone-in and skin-on chicken breasts were amazingly good. Usually the only chicken bone-in that I eat is at BW3's; I love their wings. Well I decided to go out of my comfort zone and I’m pretty glad that I did. Although the chicken, to me, seemed a little plain I know that I will be able to add more spices next time. I will definitely add more liquid, too, as there was no liquid left before cooking which I think made the chicken a little drier than it should have been. The recipe below reflects that change. They really go well with steamed broccoli (hidden in some cheese for my husband) and macaroni and cheese. If you aren’t looking for a hugely complicated recipe with a bunch of seasonings that you usually don’t have on hand, this is your recipe!

Roast Chicken with Caramelized Shallots
Adapted from: Annie’s Eats, originally The French Farmhouse Cookbook
Serves: 2-4

3 Tbsp olive oil
2 Tbsp red wine vinegar
2 Tbsp soy sauce
1/4 cup chicken broth
2 shallots, peeled and minced
2-4 pieces bone-in chicken breast (or thighs)
Salt and pepper, to taste
Minced fresh parsley

Preheat the oven to 425º F. In a baking dish large enough to keep the chicken pieces in one layer, combine the oil, vinegar, soy sauce, broth and shallots. Whisk to combine. Coat the chicken with the mixture in the dish and lay them in a single layer. Spoon some of the shallots on top of the chicken. Sprinkle with salt and pepper, as desired.

Bake the chicken for 20 minutes (until the chicken begins to brown on top) and then turn them over and spoon more of the juices and shallots on top. Bake for an additional 20 minutes or until the chicken is cooked thoroughly. The shallots should be caramelized as well. While the chicken is cooking the second 20 minutes, this is the best time to get started on side items so that they won’t get cold.

Sprinkle the chicken with parsley and serve warm.

Friday, November 19, 2010

Cinnamon Sugar Biscotti


If you've ever been to a cafe or Starbucks, you have probably seen their biscotti. Do they make them fresh every day? Maybe. You probably won't get a straight answer. If you were to ask me to choose between taking the time to bake my own biscotti or buying it at a cafe, I would choose to bake it any time! After baking this biscotti, I will never ever buy them at a cafe again! The ones you buy are so rock-hard you feel kind of like you might need to get your dentist on speed dial. Yes, I'm talking chipping-teeth hard. These have the perfect amount of crispiness complemented by a wonderful chewiness, too. They go great with hot drinks (coffee, tea, hot coco) or even a big glass of milk; dessert anyone? Did I mention that this was the first thing I've ever made to be eaten so quickly?! :)

Cinnamon Sugar Biscotti
Adapted from: Annie's Eats, originally Joy the Baker
Yields: 20-24 cookies

For the dough:
2 cups all-purpose flour
1.5 tsp ground cinnamon
1 tsp baking powder
1/4 tsp salt
1 cup sugar (granulated, white)
6 Tbsp butter, at room temperature
1 large egg, plus 1 large egg yolk
1 tsp vanilla extract

For topping:
1/4 cup sugar
1 tsp ground cinnamon
1 large egg, slightly beaten

Preheat oven to 325˚ F. Line a baking sheet with a silicone baking mat (or parchment paper). In a medium bowl, combine the flour, cinnamon, baking powder, and salt. Whisk slightly and set aside. In the bowl of a stand mixer, cream the butter and sugar together (paddle attachment) on medium-high speed until light and fluffy, about 3-4 minutes. Scrape the bowl with a spatula if necessary. Blend in the egg and yolk, beating well after each. Add the vanilla until well incorporated. Moving the mixer to low speed, slowly add the dry ingredients until a dough forms.

Divide dough into two halves and shape each half into a 9-inch long log. They should be about 1.5 inches wide. Place them onto the prepared baking sheet, spacing the logs at least 3-inches apart. In a small bowl, whisk the beaten egg briefly. Mix the cinnamon and sugar together in a separate small bowl and taste for preference. Add more sugar or cinnamon as desired. Baste the beaten egg on top of the two logs and sprinkle with the cinnamon sugar mixture.

Bake for 40-45 minutes, rotating halfway through the baking. Bake until tops are golden brown and slightly firm. Remove the pan from the oven but maintain the temperature in it. Once the logs are cool enough to handle, slice diagonally along the loaves into 1.5-inch thick pieces (10 per log). Place the sliced biscotti onto the baking sheet again, cut side down. Sprinkle with a little more of the cinnamon sugar mixture and bake an additional 10-15 minutes, until golden and crispy.

Wednesday, November 17, 2010

Pumpkin Yeast Bread


With all the pumpkin recipes I tried this year (of course, trying to make up for years past with zero), I decided against my better judgement to find a pumpkin bread recipe. I thought my husband would be so happy and even make his sandwiches each day for lunch on them. Nope, didn't happen. We let this loaf sit and sit all week while I procrastinated making apple butter. Unfortunately I only had a few slices, but they were a few slices of heaven. They were good, but I wouldn't make a sandwich with them. I would probably eat them as toast for breakfast slathered with apple butter. Mmm, sounds amazing right?! Well I'll have to give the update on that when I finally do make the apple butter; I'll be sure to make another batch of this bread.

I also halved the recipe to make only one loaf of bread and it came out perfectly. I did slice them a little too thick for my taste so I would suggest slicing about as thick as normal loaves of bread you find at the grocery store. Plus, unless you have a toaster oven, these thicker pieces may not fit well in the toaster. ;) Enjoy!

Pumpkin Yeast Bread
Adapted from: Annie’s Eats, originally King Arthur Flour
Yields: 2 large loaves of bread

½ cup warm water
1½ Tbsp instant yeast
2/3 cup warm milk
2 large eggs
1½ cups pumpkin puree
2 Tbsp vegetable (or canola) oil
½ cup brown sugar
2 tsp salt
½ tsp ground cinnamon*
¼ tsp ground ginger*
¼ tsp ground nutmeg*
dash of ground cloves
6½ cups bread flour (approximately)

* Substitute all these spices if you already have Pumpkin Pie Spice in your pantry, using 1 Tbsp.

In a bowl of a stand mixer (paddle attachment), mix the water and yeast briefly. Add the milk, eggs, pumpkin, oil, brown sugar, salt and spices. Mix briefly to combine. Add 4 cups of the bread flour to the mixture and mix until dough becomes sticky. Switch to the dough hook attachment. Continue to add the remaining flour on low speed a little at a time. You should have a dough that is not sticky anymore and smooth. Transfer dough to a well-oiled mixing bowl and turn it over to coat in the oil. Cover the bowl with a damp kitchen towel and let the dough rise at room temperature until it is doubled, about 1 hour.

Place the dough onto a lightly floured work surface. Divide in half. Shape each piece into a rectangle 9-inches long and 1-inch thick. With the rectangle horizontal, roll the dough firmly into a cylinder left to right. Pinch the seams closed well. Place each dough roll into a well-oiled loaf pan (9x5-inch). Press the loaves down so that they just touch each side of the pan. Cover with a towel and let rise at room temperature until doubled, about 45 minutes.

Preheat the oven to 375° F. Bake the loaves for about 30 minutes. You can also use an instant-read thermometer (which I don’t have .. yet) until it reads 190° F. The bread should be a little darkened. Transfer to a wire rack and let cool. Slice thinly (like the thickness of a loaf of bread).

Monday, November 15, 2010

Chicken Curry Soup


Indian food is something I’ve never tackled, nor have I had in many years. I love it, but I think my husband is just “never in the mood” for it unfortunately. Or that is his excuse anyways. Well luckily I got a free cookbook with my latest Pampered Chef order so I chose the Soups book. I figured it’s almost winter and they might come in handier than a dessert book (although I seriously considered that one but didn’t want to totally ruin my husband’s P90X plan). So I got the cookbook and all of the soups and chilis look absolutely wonderful. Luckily here in Indiana the weather could be 70º F one day and 50 º F the next so I can plan out burgers and stews in the same week.

This soup was not exactly as spicy as I thought it would be. I don’t think it’s anything like traditional Indian food but it does have a great taste. It reminded us more of a beefed up version of chicken noodle soup more than anything. It has more spices and is more flavorful than the traditional soup. Thus, this would be a great weeknight dinner for guests or just the family. I would still stick with traditional chicken noodle soup for when you are feeling a bit under the weather though.

Indian Chicken Curry Soup
Adapted from: Soups, Stews & Chilis (Pampered Chef)
Serves: 8

1 large onion, diced
1 large Yukon gold potato, unpeeled and diced
1 lb boneless, skinless chicken breasts, cubed
dash salt and pepper
1 ¼ Tbsp vegetable oil, divided
3 garlic cloves, minced
2 tsp ginger root, peeled and grated
1 ½ Tbsp curry powder
1 ½ tsp ground coriander
6 cups chicken stock (1.5L)
3 Tbsp cornstarch
2 Tbsp cold water
1 ½ cups carrots and corn mixture, chopped (originally called for peas and carrots)
¼ cup chopped fresh cilantro (optional)
3 Tbsp chopped fresh mint
¾ cup plain Greek yogurt

Combine chicken and a dash of salt and pepper in a small bowl and toss to coat evenly. Set aside. Heat ½ Tbsp of the vegetable oil in a large stock pot over medium-high heat 1-3 minutes, or until shimmering. Add the chicken and cook evenly for 3-4 minutes, until golden brown, stirring occasionally. The chicken will not be done yet, but remove it from the pot and set aside on a plate.

Add the remaining oil to the pot and add the onion, cooking until it is browned, about 2-3 minutes. Add a pinch more of black pepper and the minced garlic, ginger, curry, and coriander. Cook and stir 1 minute until fragrant. Whisk in stock. In a small bowl, combine cornstarch and cold water. Whisk to combine and add to the pot. Add in the chicken and potato to the pot and bring to a simmer. Reduce the heat to low and cook an additional 8-10 minutes or until the potato pieces are tender.

Stir in the carrots/corn mixture, cilantro (if using), mint and a pinch of salt. Remove pot from heat. Place yogurt into a medium sized mixing bowl and carefully ladle 2 cups of the pot mixture into the bowl with the yogurt. Whisk together the mixture in the mixing bowl and slowly return back to the pot. Whisk until completely incorporated. Garnish with cilantro and serve warm.

Friday, November 12, 2010

Spinach Artichoke Dip


If my husband and I are eating out at a restaurant, we typically splurge a little bit. Spinach and artichoke dip is one thing we never disagree on when it comes to ordering an appetizer. I never really thought I could replicate any dip recipe, but this is a healthier and just as tasty spinach and artichoke dip. I actually baked these in smaller ramekin's so that we could bring them in our lunches. My husband absolutely loved them! According to the website these little guys are about 100-110 calories per 1/4 cup (about the size of my rammekins). I added a tiny bit more cheese so it's a little over 100 calories.

Spinach Artichoke Dip
Adapted from: Food Network
Serves: 4-6

Pinch salt
10 oz baby spinach leaves
fresh basil (1 cup); or 4 Tbsp dry basil
¾ cup canned cannellini beans, drained and rinsed
6 oz Neufchatel cream cheese
1 garlic clove, minced
½ cup chicken broth
14 oz can artichoke hearts, drained, squeezed dry, and finely chopped
½ cup grated parmesan cheese
1 cup shredded mozzarella cheese
pinch cayenne pepper, to taste
2-3 dashes Worcestershire sauce
pinch ground pepper, to taste
chips, for dipping

Preheat the oven to 450-degrees. Boil water and salt stovetop. Prepare an ice water bowl while water is heating up by placing very cold water and lots of ice cubes into a large mixing bowl. Stir the spinach leaves into the boiling water and keep immersed for 30 seconds, until the leaves turn bright green. Remove spinach from boiling water and place into ice water bath. Drain and squeeze dry, then roughly chop.

Puree the beans, cream cheese, garlic and broth in a food processor until smooth. Transfer to medium mixing bowl and fold in the chopped spinach, artichokes, parmesan and ¾ cup of the mozzarella cheese. Add cayenne pepper, Worcestershire sauce, salt, and black pepper. Toss to combine.

Place mixture into oven-proof, greased individual ramekins or large serving bowl, about 1-quart. Top with remaining mozzarella cheese. Bake until bubbly, about 20-25 minutes at 450 degrees.

Wednesday, November 10, 2010

Pumpkin Butterscotch Cookies


I was a little hesitant to originally make these cookies because of the sunken-in appearance of the butterscotch chips. Not that the cookies have to be pretty, but it just made them look kind of hard to make. I was completely shocked by how many cookies this recipe yielded and how fluffy they were. Because of that, you really want to make sure to have plenty of milk for dipping these little lovelies into. This would make a great treat to bring to the family for the holidays and they will be astonished to see that you have found canned pumpkin puree. Too bad they don’t know that you actually made the puree yourself at home. I know that really helped me to try all of my pumpkin recipes this year. Plus if you find pie pumpkins pretty cheap, then that is all it will cost you, besides time.

Pumpkin Butterscotch Cookies
Adapted from: Annie's Eats, originally Joy the Baker
Yields: 25 cookies

2 cups plus 3 Tbsp all-purpose flour
1 ½ tsp baking powder
1 tsp baking soda
½ tsp salt
1 tsp cinnamon
2 large eggs
1 cup sugar
½ cup canola oil (or vegetable)
1 cup pumpkin puree
1 tsp vanilla extract
1 cup butterscotch chips

Preheat oven to 325 degrees. In a small bowl, combine the flour, baking powder, baking soda, salt and cinnamon. Set aside. In the bowl of a stand mixer, combine the eggs and sugar. Beat on medium-high until smooth, about 1 minute. Blend in the oil, puree and vanilla. Mix well.

On low speed, add dry mixture into the stand mixer a little at a time. Mix until well incorporated and then fold in the butterscotch chips. Drop the dough balls with a small ice cream scooper onto a silicone-lined baking sheet and bake for 14-16 minutes. Make sure to rotate halfway through the cooking time. When they are done, a toothpick should come out clean from the middle of the cookies. Allow to cool 5 minutes on the baking sheet and then transfer to a wire cooling rack.

The pumpkin taste really didn’t set in until the second day so store these in an airtight container for up to 5 days and enjoy them from the fridge or heated for a brief 10 seconds in the microwave. Don’t forget the milk!

Monday, November 8, 2010

Meatloaf


Meatloaf. Every child's nightmare. As it is with most children, it was with me. I hated my mom's meatloaf and wouldn't even try it. Once I did, I was hooked. She lured me into it by tricking me and making me think that the process to make it is fun. She was right, it actually is pretty fun. Mixing everything in a bowl and being able to smash and squeeze the life out of it is really fun and a good stress reliever for a long, hard day (not that I know about those anymore being unemployed). This meatloaf is a basic, delicious and easy recipe for any family. My husband tends to devour it leaving no slice behind. It goes really well with a teeny tiny bit of ketchup, too. For my husband's benefit, I also only put a ton of onion on one side so he doesn't have to eat them as he doesn't like them.

Meatloaf
Kelly's Kitch original
Serves: 3-4

1lb ground beef
½ cup onion (more or less for preference)
1/3 cup ketchup
2 pieces of bread, torn into 1-inch pieces
1 egg
2 pieces of bread, for baking

Preheat oven to 350 degrees. Mix all ingredients in a medium mixing bowl by hand, except the two bread pieces for baking. Grease a glass baking dish and place the two bread pieces on the bottom of the pan. Place the meatloaf mixture on top in the shape of a loaf of bread and bake, uncovered. Make sure the meatloaf is not touching the sides of the glass baking dish. Bake for 45-50 minutes, until the center is no longer pink.

Friday, November 5, 2010

Garlic Knots


I've always been afraid to make dough, breads, etc. Recently I have discovered just how easy they all are to make. I still didn't really have a great roll recipe, but I knew I was going to really need one with the cold weather approaching. I can't describe just how amazingly delicious these little rolls are. If you don’t believe me, make them yourself (please do, they are so tasty). I’m all about easy and buying store-bought items for a big holiday or get-together, but I definitely will not skimp on the rolls ever again! I even had a roll by itself for dessert later the night I baked them. They are just that good.

Garlic Knots
Adapted from: Annie’s Eats, originally King Arthur Flour
Yields: 10 rolls (or “knots”)

For the dough:
3 cups bread flour
1 Tbsp sugar
2 tsp instant yeast
1 ¼ tsp salt
2 Tbsp olive oil
¼ cup milk
1 cup plus 2 Tbsp warm water

For the glaze:
2 garlic cloves, minced
3 Tbsp butter, melted
½ tsp Italian Seasoning

In the bowl of a stand mixer fitted with the paddle attachment, combine all the dry ingredients for the dough (flour, sugar, yeast, salt). Mix briefly to combine. Add the oil, milk and water and mix until dough forms. Switch to the dough hook attachment and knead the dough on low until dough is smooth and elastic, about 8 minutes.

Transfer the dough to an oiled mixing bowl, cover with plastic wrap and let sit in a warm area for at least 1 hour (to rise). Divide the dough into 10 equal pieces. Roll each piece into a 10-inch long rope and tie a knot in the middle. Fold the ends of the dough into the middle where the knot was just formed (top end goes underneath and bottom end comes up on top). Transfer to a stone baking sheet or cookie tray lined with a silicone mat. Allow to rise, covered lightly with a kitchen towel, for 45 minutes. Knots should be puffy.

Preheat the oven to 350 degrees. To make the glaze, mix: cloves, butter and seasoning in a small bowl. Brush mixture onto the knots on the cooking sheet. Bake in the oven for 16-18 minutes until they are lightly browned on the tops. Allow knots to sit on the baking sheet for 3 minutes to cool and transfer to wire cooling rack or serve immediately.

Wednesday, November 3, 2010

Sugar Grapes


Thumbing through my great-grandmother's recipe book, I came across this recipe. Sugar, egg whites and grapes. Simply from intrigue I pulled out the ingredients from my fridge and starting making these little guys. I only did a few, just in case they didn't taste all that good. Well, the result was interesting. The sugar did harden on the skins of the grapes although some had too much sugar (never thought I'd say that). My advice to anyone that wants to make these is to not put too much sugar on the grapes. The sweetness of the sugar and juiciness of the grapes are a perfect combination. I might even suggest mixing the grapes in the egg whites and then tossing with a small amount of sugar in a small bowl. Although they are a little sweet, they make for great finger food or a sweet side dish to your holiday meal. Another idea is just for a centerpiece or visual effect, these are adorable!

Sugar Grapes
Kelly's Kitch Original

20-30 grapes
1 egg, yolk removed
Sugar to coat

Dip the grapes in the egg white and then into a small bowl containing the sugar. Place the grapes on a cookie sheet to dry. If you want to speed the process a little, dip the grapes into the egg white and place in a small bowl. Then, add a little sugar at a time and coat the grapes, until desired coverage. Allow the sugar to harden on the skin of the grapes for at least 1 hour.

Monday, November 1, 2010

Chicken Empanadas, revisited


I first made these quite some time back but the picture was dull, lifeless and let's be honest: unappetizing. I absolutely turn to these empanadas whenever I have the craving for Mexican but don’t have a lot of time (or energy) for a complete meal. These would be perfect for an appetizer as well since they qualify as “finger food” and are small. Whatever the occasion, these little bites are sure to please anyone!
Chicken Empanadas
Adapted from: Paula Deen
Serves: 4-6

2 boneless chicken breasts, cooked and cubed small
8 oz Monterey Jack Cheese blend
4-6 ounces softened cream cheese
1/2 cup chopped red bell pepper
1 jalapeno, seeded and chopped
1 tbsp ground cumin
salt and pepper, to taste
3 pie crusts, unbaked
water

I cooked the chicken ahead of time by boiling 2 parts water, 1 part chicken broth. Bring to a boil, then reduce the heat and simmer for 20 minutes or until chicken is cooked. Remove the chicken from the pot and set aside on a plate to cool.

Preheat oven to 400 degrees. Lightly grease two baking sheets. In a large bowl, combine all ingredients except water and pie crust. Mix well. Unroll one pie crust onto lightly floured surface and roll into a 15-inch circle (a bit thinner than what the package comes in). Cut rounds using a large cookie cutter (or I used the rim of a can from a 28-ounce jar of diced tomatoes). I am all about reycling! ;) As the rounds are cut, place a generous 1 tbsp of the mixture in the middle. With a clean fingertip, lightly brush the edges of the crust with the water. Fold dough over and seal gently with a fork.

Repeat and re-roll all dough until all empanadas are made and placed on baking sheets. Bake for 15-17 minutes and allow to cool for 1-2 minutes before serving. They will be hot!

Friday, October 29, 2010

Whipped Pumpkin Dip


I never thought I'd like pumpkin so much. Pumpkin bars, cookies, pies, and more have usually a mediocre taste for me, especially since I'm picky and don't like pumpkin that much yet. This has changed my entire way of cooking and thinking for the fall season. I think I tried so many pumpkin recipes because I wanted to find that one recipe that just knocked my socks off and was to-die-for good. Well, my friends, that search has ended .. with this dip recipe!

I like normal fruit dip but it’s got no flavor and is usually 90% sugar. Although this recipe still isn’t the healthiest, it’s ten times better for you than the store-bought dip. As an added bonus, you will O.M.G. at the taste of it, I promise. I can’t believe I have been refusing to try pumpkin all these years. Thank you to Mrs. Holman for drumming up this recipe and making my fall/pumpkin/dip dreams come true (even if I didn't know I had them)! ;)

Whipped Pumpkin Dip
Adapted from: Homemade by Holman
Yields: about 5-6 cups

8 oz cream cheese, at room temperature
¾ cup brown sugar, packed
1 cup pumpkin puree
1 tsp pumpkin pie spice
1 tsp ground cinnamon
1 cup heavy whipping cream*
3 Tbsp powdered sugar*
Apple slices, grapes and Nilla Wafers, for dipping

Place the bowl of a stand mixer in the freezer, briefly for about 5-10 minutes. In the cold bowl, beat the whipping cream on high speed with the whisk attachment until stiff peaks form, about 5 minutes. Slowly add the powdered sugar 1 tablespoon at a time until mixed well.

* If you don’t have a stand mixer at home, omit these two ingredients (and steps) and just buy whipped cream in the container at the store instead.

Meanwhile, in a separate large mixing bowl, beat the cream cheese and brown sugar until fluffy and smooth. Add in the puree and spices and blend well. The mixture will be pretty thin at this point. Fold the whipped cream from the stand mixer (or store purchased container) into the bowl with the pumpkin mixture. Mix well to make even throughout. Serve immediately or keep in airtight containers in the fridge for up to 4-5 days.

This mixture goes well with apples, grapes and Nilla Wafers.