It's starting to feel more like fall and you all know what that brings; cooler weather and pumpkin, well, everything! I am so excited this year to be spending Camden's first Halloween as a family. I remember last Halloween I had just found out that I was pregnant with him and here he is a year later, cute as ever! I'm not getting him a costume since he will only be 3 months old, but he does have a "My First Halloween" onesie for the day time and a cute sleeper for the evening. I swear this kid is so stylish. Anyways, in the fall I usually like to bake everything pumpkin and butterscotch. It's the time for chili's and stews. I LOVE this time of year!!!
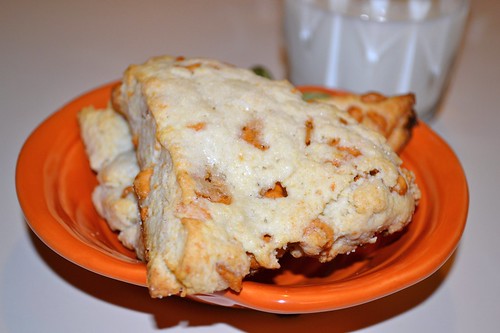
This recipe is just the same as my chocolate chip scones, but they taste even better with butterscotch! I have also tried white chocolate which are to-die-for good as well. These definitely will get you and your family into the fall mood and won't disappoint! I would venture to say that 90% of the time, we have a bag of these in the freezer. Yup, they're that good!
Chocolate Chip Scones
Adapted from: Annie's Eats, originally Hershey's
Makes: 6 scones
1½ cups plus 2 Tbsp all-purpose flour
¼ cup sugar
2 tsp baking powder
pinch of salt
1 cup butterscotch chips (6 oz)
1 cup heavy cream
2 Tbsp butter, melted
additional sugar for sprinkling (optional)
Preheat the oven to 375°F. Line a large baking sheet with grease or a silicone mat. In a medium bowl, combine flour, sugar, baking powder and salt and stir to mix well. Add in the chocolate chips and fully incorporate them into the mixture. Add the heavy cream to the mixture and mix until dough forms and the dry ingredients are just incorporated. I did this by hand instead of my stand mixer and it turned out phenomenal.
Knead dough very briefly with well floured hands on a clean surface. Scoop rounds onto baking sheet or roll a circle out of the dough about 1/2-inch thick. Cut into triangles (like you are cutting a pizza) and place dough pieces on the baking sheet. Brush lightly with melted butter and sprinkle with additional sugar. Bake 18-22 minutes, until edges are slightly browned and center is cooked (using toothpick method).
Note about freezing: Only bake the scones you wish to eat right away. The best way to enjoy these scones throughout the week is to freeze them. Once you have shaped the dough pieces, wrap them in plastic wrap and place in the freezer in a ziploc bag.
The morning you wish to have a scone for breakfast, preheat the oven to 375°F and cook on the baking sheet and silicone mat for 20-23 minutes. No need to brush the butter and sugar on top. The frozen ones actually tasted better than the fresh so doing this will ensure a warm, fresh breakfast.

No comments:
Post a Comment