Wednesday, July 28, 2010

Pampered Chef

I love cooking but truly used to believe that you could make anything even if you didn't have the right tools. While that may be true, I think it's easier and less stress on the cook when you actually do have the right tools.

Last weekend I hosted my very first Pampered Chef party! It was such a success I decided that I probably will host another in the winter time. Unfortunately for our bank account (as my husband sees it), I have fallen in love with Pampered Chef products.

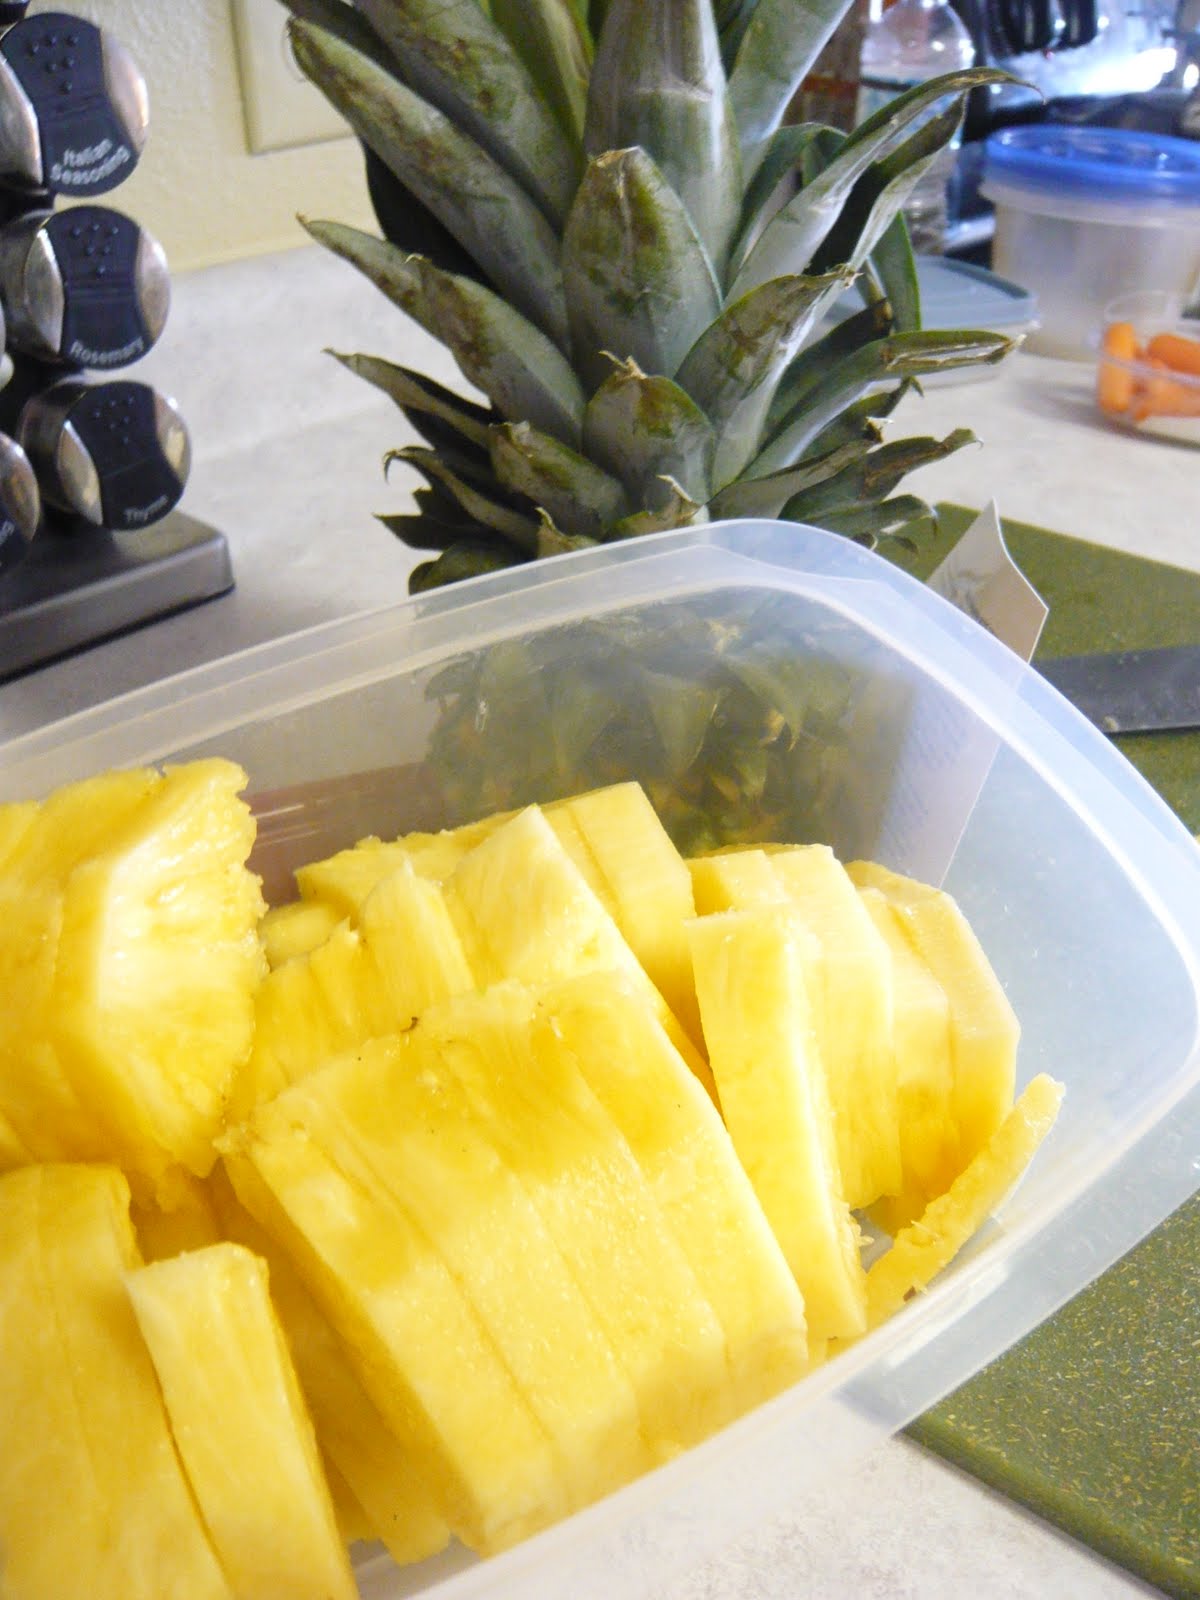
Here is the consultant, Rachel, with the pineapple wedger.

And voila!! Easy as pie!

She made a delicious and untraditional salsa with pineapple, cucumber, cilantro and tomatoes. It was fantastic! She also made homemade tortilla chips (that I will soon be posting the recipe for).

The best part of my show? THE MOJITOS!! Funny thing is, when I asked who wanted a non-alcoholic mojito, it was so quiet you could hear a pin drop! So we all apparently like a little rum. ;)

Well the party went wonderfully without a hitch and there were much more products that I wanted to order but as a host, I can go to other shows for the next year and still get my 10% discount! I have a long list of wants:


And my big discount for hosting a show this month? I get the food chopper (above) for just $11.80 instead of $29.50!!!!

So if anyone out there doesn't have a Pampered Chef consultant and wants just a few things, feel free to order here and put in the host name: Kelly Jones (Indiana). Thanks for looking and be careful with the website.;) EDIT: My show will close Friday, July 30, 2010 but you can still order through the website at any time!

Sunday, July 25, 2010

Ham and Cheese Sliders


I saw these on a blogger's website and thought to myself that I would probably never make these because of my everlasting hatred for ham. I have despised the fatty taste of ham ever since I can remember and will ONLY eat it from HoneyBaked Ham now. Since I have decided to change my mind for what is probably the most fattening yet delicious ham ever I decided to give this a try, too. Although it's nothing I would brag about, my husband and his teammates thoroughly enjoyed these! I even ate two myself!! I wanted to wait until football season was in full swing to make these, but I just couldn't wait since the perfect opportunity presented itself. My husband plays in an Adult League Baseball team here and they had a double header the other night: 6pm and 9pm. I knew he wouldn't eat anything unless I brought it to him well before the game so I quickly threw these together and they inhaled them! Not that those guys are picky, but I would definitely call this a success!

Ham and Cheese Sliders
Adapted from: Annie's Eats, originally The Girl Who Ate Everything

For the sandwiches
12 slider rolls (I bought Hawaiin rolls and sliced them down the middle)
12 slices honey ham
12 slices swiss cheese
mayonnaise

For the topping
3/4 tbsp yellow mustard
4 tbsp butter, melted
1/2 tbsp finely minced onion
1/2 tsp Worcestershire sauce
poppy seeds, for topping

Preheat oven to 350 degrees. Start by placing the slider rolls on a baking sheet and slicing them, if needed. Slather on some mayonnaise on the top bun, as much as desired. Place a few small slices of ham and cheese on top of the bottom bun and place tops on sandwiches. Mix the sauce ingredients, except poppy seeds, and baste on the tops of the sandwiches. Sprinkle poppy seeds on top immediately. Cover baking sheet with foil and bake 10 minutes, until cheese has melted. Uncover and bake an additional 2 minutes. Serve warm.

Friday, July 23, 2010

Teriaki Burgers with Mango Strawberry Salsa


The most appetizing thing I can think of is a hamburger. The second is fruit. Why have I never thought to combine the two? I have no idea, but this was phenomenal. I have never in my entire life of loving hamburgers not needed to slather on the mayo! The sauce and salsa both combined provided a fantastic taste that I just couldn't add anything to. The sauce was a little heavy on the soy so I decided to half it for next time, which is reflected below. It wasn't too overpowering that I couldn't eat the burger, though. I also replaced pineapple with strawberries because my pineapple I had cut earlier in the week was brown and all I had were strawberries. I think next time I might try the pineapple version just to see how differently it tastes.

Teriaka Burgers with Mango Strawberry Salsa
Adapted from: Annie's Eats, originally White on Rice Couple

For the salsa
1 mango, diced
1 cup strawberries, diced (or pineapple)
1/2 red pepper, diced
1/4 cup red onion, diced
1 tbsp cilantro
lime juice of one lime
pinch of salt

For the sauce
1 cup strawberries, diced (or pineapple)
1/4 cup soy sauce
1 1/2 tsp ginger powder
2 garlic cloves, minced
1/2 tsp vinegar (white, apple)
1/2 tsp sesame oil
1 tbsp cornstarch
1 tbsp cold water

For the burgers
2 tbsp onion, finely minced
1 tsp garlic clove, minced
salt and pepper, to taste
dash of Worcestershire sauce
1 lb ground beef

First, make the salsa by combining all ingredients in a small bowl and tossing to combine. Cover with saran wrap and refridgerate until needed for topping.

Next, make the sauce by combining all ingredients except cornstarch and water. Mix well and place in a small saucepan on the stove on medium heat. Heat until slightly bubbly. Meanwhile, combine cornstarch and water in small bowl until smooth. Once the mixture on the stove is bubbly, add cornstarch mixture and stir in completely. Heat on medium-low for another 3 or so minutes, until thickened.

Finally combine all ingredients for the burger and form into desired shaped patties. Note: I always make my patties thicker and a larger diameter because it's inevitable what level of heat I have it on, they will always shrink a little. Cook burgers on the grill at desired temperature until done. Place burgers on hamburger buns and top with sauce mixture, then salsa and enjoy as-is!

Tuesday, July 20, 2010

Summer Chicken Salad


I have been inspired in the past to try and make restaurant food at home. Usually I am unsuccessful because I'm not the type of food guru it takes to figure out what ingredients are in something just by tasting it. Well this was one huge exception. I get this salad every single time that I go to Paradise Bakery & Cafe because it's so delicious. There, it comes with strawberry vinaigrette but at home we have balsamic. Both are amazing with this salad!! This salad has everything .. even chicken (although you can't see it in the picture). It was even fun to make because I set up a little station almost like taco night to put the fruit toppings on.


Summer Chicken Salad
Adapted from: Kelly's Kitch original

1 boneless, skinless chicken breast
3 cups salad/lettuce mix (I chose spring mix)
3 tbsp raisins
3 tbsp strawberries, chopped
3 tbsp blueberries
3 tbsp pineapple, diced
3 tbsp raisins
2 tbsp pecans, chopped
olive oil
salt and pepper, to taste

Preheat oven to 425 degrees. Drizzle a small amount of olive oil in a small glass baking dish. Place the chicken breast in the oil and flip to cover. Then, sprinkle salt and pepper to desired taste and bake for 15 minutes. Since my chicken breast was quite thick and I wanted to bake it faster, I simply placed it loosely in saran wrap and beat it with a meat tenderizer until it was the desired thickness. You can also buy thin chicken breasts if you desire.


Once the chicken has cooked, place on a plate or cutting board and slice into 1-inch cubes, set aside.

Place half of the lettuce in a serving bowl and top with chicken. Then place 1.5 tbsp of strawberries, blueberries, raisins and pineapple. Place 1 tbsp of chopped pecans on top. You may drizzle desired dressing on top or place in small bowl on the side. This really helps to save TONS of unnecessary calories. I highly recommend: strawberry vinaigrette or balsamic vinaigrette dressings.

Yields: 2 salads

Saturday, July 17, 2010

How to slice a whole pineapple

I was inspired by a friend recently to post this. A lot of people buy canned pineapple or just really don't want to take the time or energy to cut up a whole pineapple. I'm here to let everyone know that it does take more time than opening a can, but the taste and flavors are SO MUCH more worth it. It's only a few extra minutes anyways. Here is how to cut a pineapple the perfect way!

First, cut off the top while the pineapple is on its side.


Then, place the pineapple vertically (exposed side up) and slice right down the middle.


Next, chop off the bottoms of the two slices.


Then, cut the halves into quarters by cutting right down the middle.


Next, set each piece vertically again and cut an even slice down the pointed edge to cut off the hard, center.


Then, taking your knife begin to cut off the skin about halfway up the outside of the pineapple.


When you get close to the opposite edge, turn the knife so that it is cutting the pineapple skin off at a perpendicular manner (see picture below).


Then continue to cut down and around so that the skin is removed.


Remove and discard the skin.


Slice the pineapple to desired widths.


Place in an airtight/tupperware container and keep refridgerated.


Not so hard, right!? I often enjoy fresh pineapple for a mere $3.99 .. and if I am lucky enough I can find it for $2.99 but that is rare. My only suggestion would be to cut the pineapple within 24 hours of purchasing it because I have allowed some to sit on the counter thinking they would stay good if I didn't cut them. This is not true.

Thursday, July 15, 2010

Zuccini Bread


I will admit that as a child and even a young adult, I really did not like straying from my normal meals. I didn't even think I liked zucchini before making this recipe, but had never even tried it. I'm so sorry to all the delicious zucchini's out there for being so judgemental! I absolutely LOVED this bread! I have never tried a zucchini recipe nor tasted anything with zucchini in it before. This recipe really wowed. I think it's better than my banana bread recipe so I guess I will have to go back to the drawing board on that one.

Zucchini Bread
Adapted from: all-recipes

3 eggs
1 cup canola oil
2 cups sugar
2 cups grated zucchini*
2 tsp vanilla extract
3 cups all-purpose flour
3 tsp cinnamon
1 tsp baking soda
1/4 tsp baking powder
dash salt
1/2 cup chopped walnuts

Grease and lightly flour 2 small loaf pans, about 8x4 in measurement. Beat eggs in stand mixer with paddle attachment until frothy (3 minutes). Mix in oil and sugar and continue to mix on medium speed. Add in zucchini and vanilla.

In a separate bowl combine flour, cinnamon, baking soda, baking powder, salt and nuts. Slowly add to mixture in stand mixer on low speed. Continue to mix until well blended.

Divvy up the mixture into two equal batches and pour into greased loaf pans. Bake at 325 degrees for approximately 55-65 minutes. They will darken more than you think they should but don't worry!

* I looked up online how to grate zucchini (as I have never done so) and it is as simple as using a cheese grater. Just cut one end off and use the largest round holes on the grater; you don't even need to peel or de-seed the zucchini. Just grate it all! I got 4 cups+ from a large garden zucchini from a friend.

Tuesday, July 13, 2010

The Perfect Hamburger


We all have our super-secret hamburger recipes for grilling in the summer time. Well, this is my personal (and continuously changing/improving) hamburger recipe! I used to just grill plain ol' burgers but that just didn't have enough flavor. It's no wonder I slathered on the mayo like it was going out of style. At any rate I have heard of other people putting things into the burger recipe so I gave it a whirl this past week. I had a leftover jalapeno pepper so I threw some of that in, a dash of BBQ sauce, onions and voila! Perfection! The only thing I think I will do next time is slice more jalapeno's to be able to top the burger with.

The Perfect Hamburger
Adapted from: Kelly's Kitch original

1 lb ground beef
1/3 cup BBQ sauce
1/2 jalapeno, seeded and chopped
1/4 cup sweet onion, chopped
toppings (mayo, tomato, etc)

Mix all ingredients in a medium mixing bowl with hands. Form 4 thick (and large-diameter) patties and place on the grill, low heat, until cooked. The patties will shrink a little bit so make them bigger than you want. Place on hamburger buns and top with desired toppings!

Sunday, July 11, 2010

Sesame Hamburger Buns


Hamburger buns. Only $1.00 at the local super market. Do they stand up to these buns (haha no pun intended) at all? Absolutely not!! These hamburger buns are the absolute best that I have ever made. They were definitely a trial run but so much worth it. My husband even commented, "Now if we could just figure out how to make these into hot dog buns.." Oh honey, that already crossed my mind!

One of the things I will do differently is allow the buns to rise longer on the second rise. When I put the egg mixture on top (to coat with sesame seeds), the buns went a little flat. Also I think I will not try to cook them with the pan of water. That actually steamed up our entire house and I am very surprised our fire alarms didn't go off. We had to open lots of windows..

Sesame Hamburger Buns
Adapted from: Annie's Eats, originally The New York Times

3 tbsp warm milk
1 cup warm water
1 package instant yeast (about 2 tsp)
2.5 tsp sugar
dash salt
1 egg
3 cups bread flour*
1/3 cup all-purpose flour
2.5 tbsp butter, softened

For topping:
1 egg beaten with 1 tbsp water
sesame seeds

In stand mixer fitted with paddle attachment, mix milk, water, yeast, sugar, salt and egg together. Mix only briefly to combine all ingredients. Add in flours and mix well. Switching the paddle attachment out for the dough hook, add in butter and mix well. Knead with dough hook for 6-8 minutes. The dough will be a bit sticky.

Transfer dough to lightly oiled bowl and cover with plastic wrap. Keep in warm area (I placed mine on a window sill in the sun) and allow to rise until doubled for about 1-2 hours.

Divide dough into 8 equal parts. Roll gently and place onto well-greased cookie sheet about 2-3 inches apart. If you have a silpat, this would work, too. Cover pans very loosely with greased plastic wrap and allow to rise for 1-2 more hours.

Once buns have doubled in size, baste with butter topping mixture and sprinkle sesame seeds on top. Bake in oven on middle shelf at 380 degrees for 6 minutes, flip, and cook an additional 6-8 minutes. Buns should be golden brown. Place buns on cooling racks and slice once cool enough to handle.

* I had no idea what "bread flour" was but apparently it's right next to the all-purpose flour you can purchase at your local supermarket. I love how much I learn with each new recipe!

Friday, July 9, 2010

Classic Apple Pie


Apple Pie and Independence Day go together like .. Santa Clause and Christmas! This is the first completely homemade pie I have ever made! I absolutely loved it and my husband's friends were in shock I think, since they don't eat anything that can't be nuked. (Side note: they all work for Whirlpool so they get all kinds of Kitchen Aid gadgets on a weekly basis but don't use them. Don't cry about this like I did. Haha). At any rate, this was a huge success. I did make the homemade crust and that recipe will be posted later this week. For now, I will re-highlight my mother's (and grandmother's) amazing Apple Pie!

Classic Apple Pie
Adapted from: Kelly's Kitch original

3/4 cup sugar
1/4 cup flour
1/2 tsp cinnamon
1/2 tsp nutmeg
7 medium to large apples (I used 3 granny smith and 4 fuji), peeled and sliced
3 tbsp butter or margarine
3 tsp lime juice (or lemon juice is a great substitute)
2 nine-inch pie crusts

Stir together sugar, flour, cinnamon and nutmeg in large bowl. Mix in apples until mixture is paste-like.

Add mixture into greased pie pan lined with one pie crust. Cover with the second pie crust and fold edges over and make into zig-zag (crust) pattern. Cut 6-8 slits in the top of the pie crust about an inch long. Sprinkle crust with cinnamon.

Cover edges of crust with foil and bake for 30 minutes at 425 degrees (conventional). Remove foil and bake another 15-20 minutes until crust is golden brown.

Wednesday, July 7, 2010

Classic Rice Krispie Treats


Happy 4th of July weekend!! I went out of town enjoying some beaches, booze and good friends! I hope everyone had a fantastic holiday. Here is a little goodie to get the weekend started off just right (possibly for next year)! I wanted to make some kind of treat for my coworkers since this past week was my last one in the office. Since it was right before the holiday I decided to make something festive! I made a batch of classic Rise Krispie treats and dyed some red and others blue! It has been a while since I had made these treats and I forgot how sticky and uncontrollable they really are. Below are some insights to make this a positive experience (aka not decorating your hair with marshmallow goodness).


The recipe I got was magnificent. Everyone commented that they were the best treats they had ever had. I guess it helps that nobody usually takes the effort to make these on a consistent basis. At any rate, I tried using parchment paper and that stuck to these like crazy. The best advice I have is to just put the treats (once cooked and mixed thoroughly) from the pan straight into a glass baking dish, greased, and press them into it to form one giant treat. The best way to press is to grease your hands with cooking spray and go to town. ;) Cut them later once they cool and you will have less of a mess.

Classic Rice Krispie Treats
Adapted from: Rice Krispies website

3 tbsp butter or margarine
1 pkg regular marshmallows (10 oz, 40 marshmallows)
6 cups rice krispie treats

In a large saucepan* melt butter and add marshmallows on low-medium heat. Continue to stir until completely melted. Once melted, add food coloring (if desired) and mix well. Add in rice krispies and stir to coat evenly. Pour mixture into a greased glass baking dish and press firmly to take shape. Allow to cool for at least an hour and cut with greased cookie cutter or knife. Best if eaten same day of preparation but they can be stored in an airtight container for a few days as well.

*I highly recommend using a saucepan instead of a skillet or otherwise. The marshmallows take a LOT less time to melt and mix better in a saucepan.

Thursday, July 1, 2010

Blackened Salmon Fillets


Here lately when going to the grocery store, I find myself going without a list which can be pretty dangerous. I have been making myself only get the bare essentials: meat, fruits, veggies, and some side items. I need to figure out how to cook things without a fancy 20-ingredient list and 45 minutes of preparation. This was the perfect recipe I stumbled upon because it uses all spices that I have in my pantry! The reviews online said it was spicy but I couldn't taste it. I think it was just right!

Now cooking salmon can be tricky. You have to make sure that it is thoroughly cooked (and flaky) but not too over cooked and dry. It takes some time and even I haven't totally mastered it.


In the picture above you can see that the top is done but the bottom isn't. You should wait until you can easily flake off the salmon from the skin. If it's skinless then it should be somewhat difficult to remove from the pan because of crumbling.


Here is a picture of the spices I used! I just love these pictures; so colorful! Also if you notice on the website link below, the ingredients are doubled and it says it would be for 4 fillets. We had one big fillet so I halved the recipe and had quite a bit leftover. The recipe below will be sufficient unless you are feeding a group of 5 or more.

Blackened Salmon Fillets
Adapted from: Allrecipes

1 tbsp ground paprika
1/2 tbsp ground cayenne pepper
1/2 tbsp onion powder
1/4 tsp salt
1/4 tsp ground black pepper
1/8 tsp dried thyme
1/8 tsp dried basil
1/8 tsp dried oregano 
2-4 salmon fillets, skin and bones removed*
1/4 cup unsalted butter, melted

Mix all seasonings in a small bowl and set aside. Brush the butter onto one side of the fillet and then sprinkle on some of the seasoning mix (as much as desired). Then, brush the fillet again with the butter and place in a large skillet on medium-high heat. Leave on for approximately 5 minutes (depending on the thickness and size of the fillet). While it is cooking, lightly brush some of the melted butter on the other side and seasonings as well. Flip the fillet over and cook until no longer a shiny-pink color inside and it flakes easily. Serve immediately! Fish like this tends to get cold quickly so it is best served straight from the pan.

*You don't necessarily have to remove the skin. If you don't, just put butter on the skin side and cook second because it will be easier to remove from the pan.